Thu Mar 14 - Written by: Ruth
Small Bathroom Goals; 9 Layout Ideas That Maximize Every Inch
Discover smart layout solutions for small bathrooms that make the most of limited space. Learn how to create a functional and stylish bathroom with clever storage, space-saving fixtures, and strategic design choices.
Living with a tiny bathroom doesn’t mean you have to sacrifice style or functionality. Whether you’re in a cozy apartment or an older home, small bathrooms can feel cramped and cluttered. But with smart planning and creative layout ideas, you can transform your compact space into a well-organized oasis.
You’ll be amazed at how much potential lies within those limited square feet. From strategic storage solutions to clever fixture placement, we’ve got nine genius layout ideas that’ll help you make the most of every precious inch. These practical tips won’t just make your bathroom look bigger – they’ll actually make it work better for your daily routine.
Understanding Small Bathroom Layout Principles
Transforming a small bathroom starts with understanding essential design principles that maximize functionality in limited spaces.
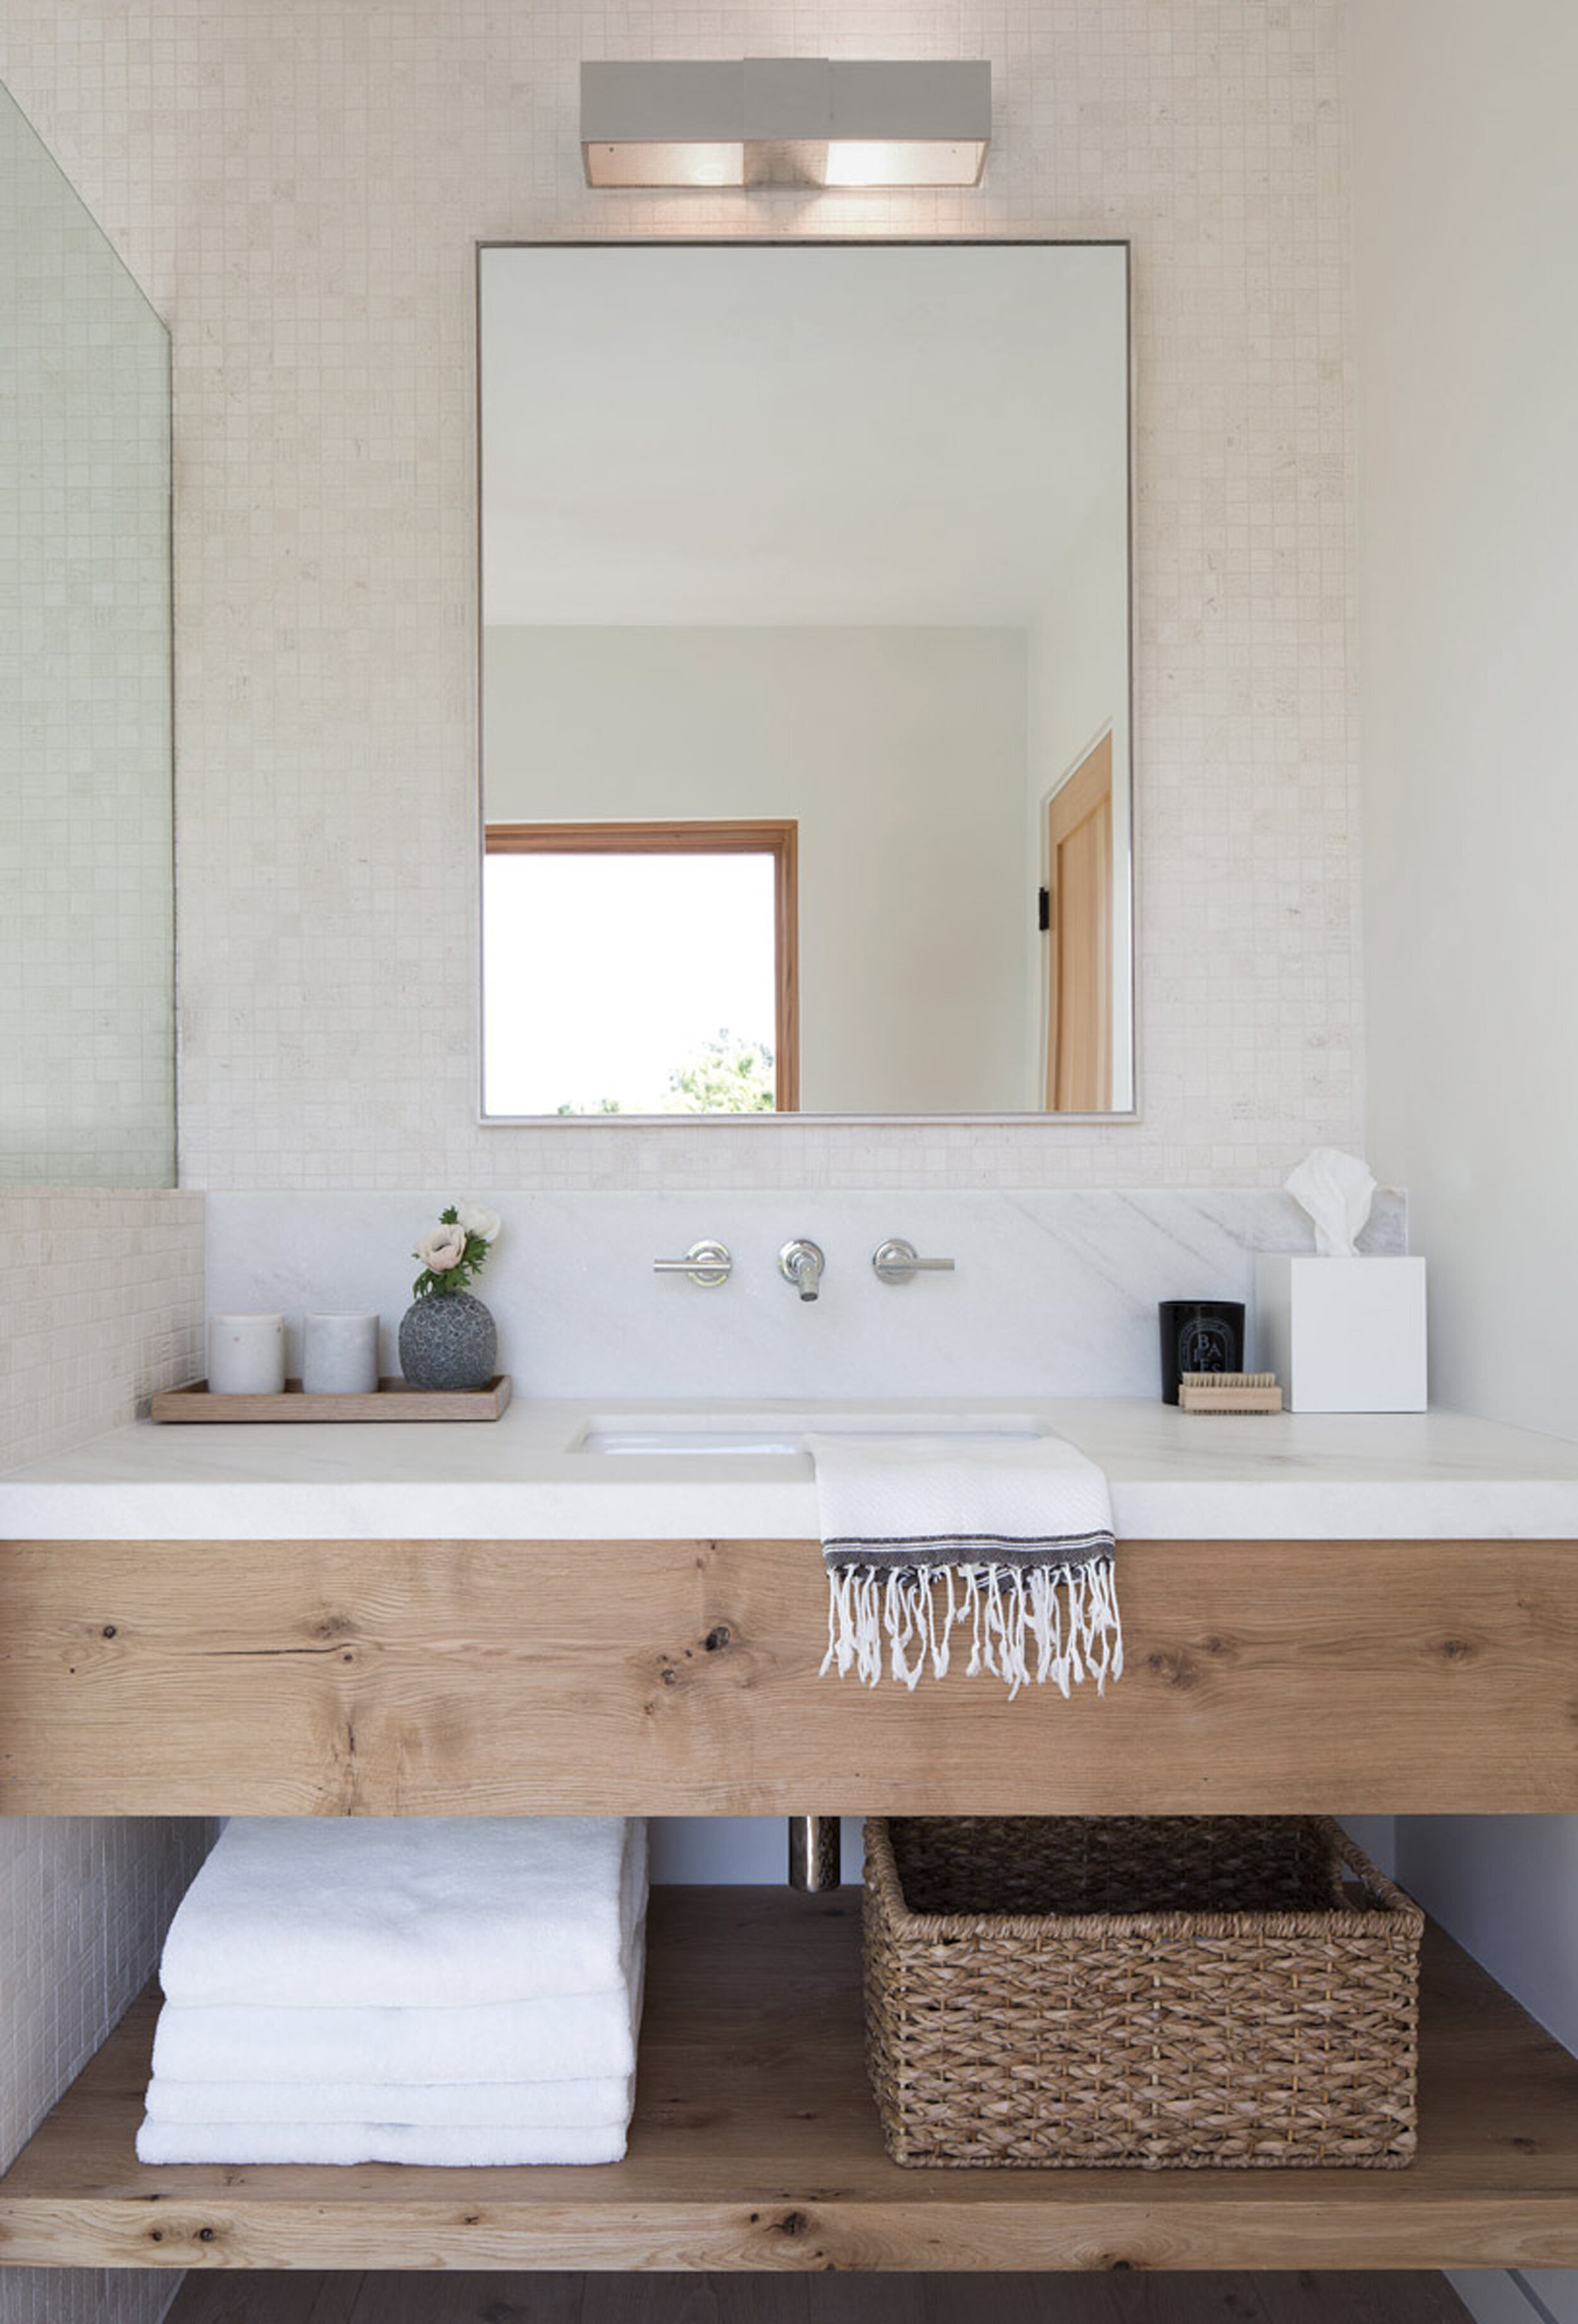
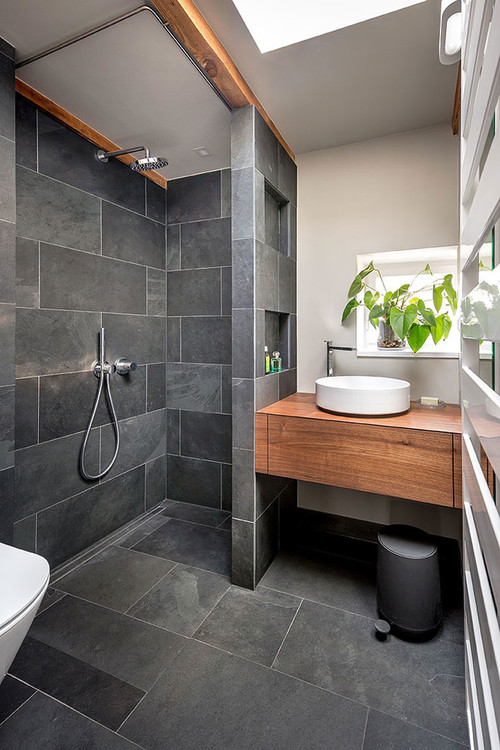
 Smart small bathroom design with open shelving and a floating vanity to maximize visual space. Source: COCOON
Space-Saving Design Fundamentals
The key to optimizing a tiny bathroom lies in smart zoning and vertical thinking. Create distinct zones for your toilet, sink, and shower while maintaining a clear path between them. Think vertically by installing floating fixtures that open up floor space and make your bathroom feel larger. You’ll want to keep a minimum clearance of 21 inches in front of fixtures and 15 inches from the center of your toilet to any wall or fixture.
Consider using corner installations for your sink or toilet to maximize awkward spaces. Install recessed medicine cabinets and shelving units into wall cavities to gain storage without sacrificing precious floor space. Remember to include adequate lighting in each zone to prevent dark corners that can make your space feel smaller.
Measuring Your Available Space
Start by creating a detailed floor plan with precise measurements of your bathroom’s dimensions. Measure the length and width of your space, including the ceiling height, door swing radius, and window placement. You’ll need these measurements:
- Floor dimensions from wall to wall
- Door and window dimensions including trim
- Location of existing plumbing lines
- Distance between fixtures
- Ceiling height in all areas
- Placement of electrical outlets
Take photos of your space from multiple angles and note any architectural features like sloped ceilings or exposed pipes that might affect your layout. Remember to factor in building codes, which typically require 30 inches of clear floor space in front of fixtures and a minimum of 15 inches between fixture centerlines.
Maximizing Vertical Storage Solutions
Transform your limited bathroom space by taking advantage of your walls’ untapped potential for storage and organization.
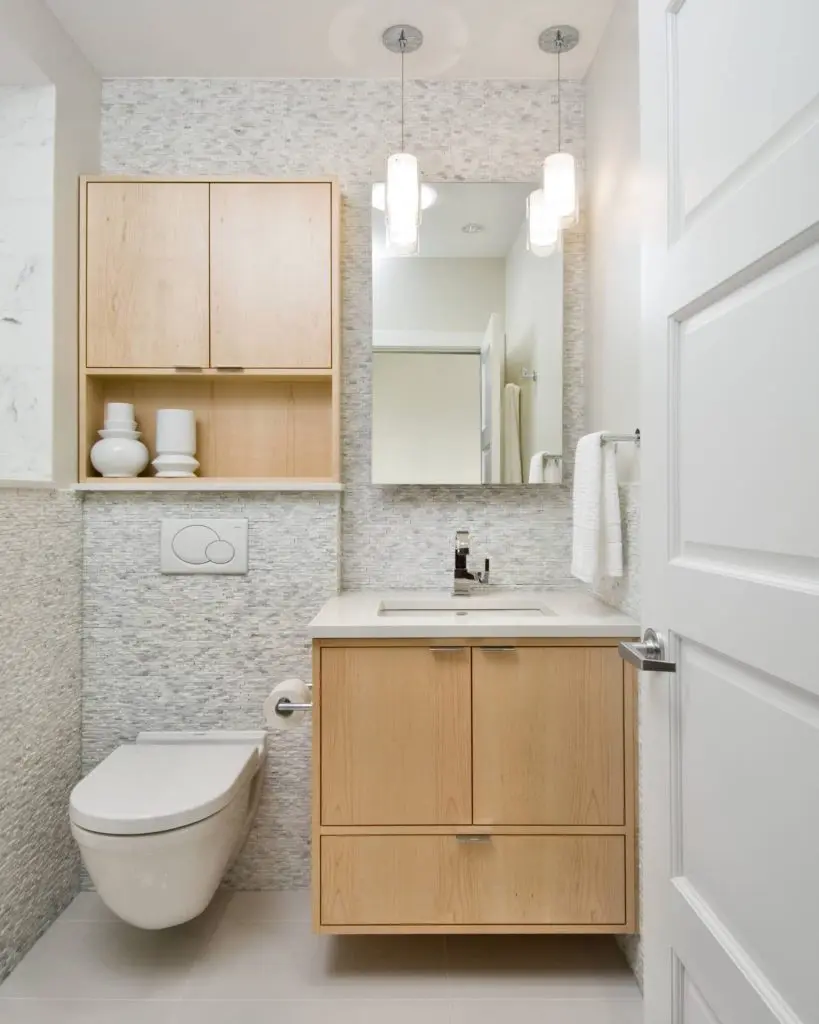
Wall-mounted fixtures create a sense of openness and provide enhanced functionality in a limited space. Source: Sachi Lord
Wall-Mounted Fixtures and Cabinets
Wall-mounted fixtures are your secret weapon for creating a spacious feel in tiny bathrooms. Install a floating vanity to free up valuable floor space while adding modern style to your bathroom. Add slim wall-mounted medicine cabinets that extend from floor to ceiling, providing ample storage without consuming precious square footage. Consider installing towel racks at different heights and mounting sleek open shelving units for frequently used items. For a space-saving combo, try a wall-mounted faucet paired with a narrow sink to maximize counter depth.
Over-the-Toilet Organization Systems
Don’t let the space above your toilet go to waste – it’s prime real estate for storage solutions. Install an over-the-toilet étagère that combines open shelving with enclosed cabinets for a mix of display and hidden storage. Add adjustable wire racks or floating shelves to store extra toilet paper, towels, and toiletries. For a built-in look, consider installing cabinet units that wrap around the toilet tank, creating a custom storage solution. Use decorative baskets and containers on these shelves to keep items organized while adding style to your bathroom’s vertical space.
Creating Visual Flow with Corner Installations
Corner installations transform awkward angles into functional spaces while creating a natural flow in your small bathroom.
 A corner sink installation with large mirror creates an open feel in a compact bathroom. Source: Freepik
Corner Sink Arrangements
A corner sink maximizes your bathroom’s usable space by fitting snugly into an otherwise wasted angle. You’ll find various space-saving options like wall-mounted corner sinks or compact corner vanities that offer storage underneath. Install a mirror that wraps around the corner to create depth and improve visibility while getting ready. For added functionality, pair your corner sink with floating shelves on adjacent walls to keep essentials within arm’s reach. This setup lets you move freely while maintaining clear pathways to other fixtures.
Corner Shower Designs
Corner showers make perfect sense in tiny bathrooms by utilizing the natural architecture of the space. Choose from neo-angle designs with diagonal entrance doors or quarter-round shapes that smoothly curve outward. Add clear glass panels to maintain visual openness and opt for frameless designs to reduce visual clutter.
:max_bytes(150000):strip_icc()/charliecoull.v1-d0c817dd5a324356b8758d0101a48c89.jpg) A frameless glass corner shower creates visual space while maximizing functionality in a small bathroom. Source: The Spruce
A frameless glass corner shower creates visual space while maximizing functionality in a small bathroom. Source: The Spruce
Install a corner caddy or built-in corner shelves to keep shower essentials organized without taking up precious floor space. Strategic placement of shower controls near the entrance lets you adjust water temperature without getting wet.
Implementing Space-Efficient Fixtures
Smart fixture selection can transform your tiny bathroom into a more functional space while maintaining style and comfort.
Compact Toilet Options
Round-bowl toilets save up to 3 inches of space compared to elongated models, making them perfect for tight spots. Consider dual-flush models that measure just 24-26 inches front to back while offering eco-friendly flushing options. Wall-mounted toilets free up 9-10 inches of floor space by concealing the tank inside the wall.
 A modern space-saving toilet with streamlined design creates a cleaner look while saving valuable inches. Source: Apartment Therapy
Look for compact one-piece designs with a smaller footprint like the Swiss Madison Sublime or TOTO Aquia, which pack powerful flushing action into a streamlined 25-inch depth. Corner toilets can work wonders in awkward layouts by utilizing dead corner space effectively.
Wall-Hung Vanity Choices
Floating vanities create the illusion of more floor space while providing essential storage. Opt for slim profiles like the 18-inch deep IKEA Godmorgon or Fresca FCB8010 that extend just 14 inches from the wall.
 Wall-mounted vanity with storage drawers maximizes floor space in a compact bathroom. Source: Amazon
Space-saving features to look for include built-in towel bars, pullout organizers, and hidden electrical outlets. Choose models with integrated sinks to eliminate extra counter depth requirements. Popular compact options include the 24-inch Kohler Jute and American Standard Studio S, which offer ample storage in widths under 30 inches. Add a medicine cabinet above to maximize vertical storage without sacrificing style.
Optimizing Door and Entry Placement
Strategic door placement can make or break your small bathroom’s functionality. Here’s how to maximize space with smart door solutions.
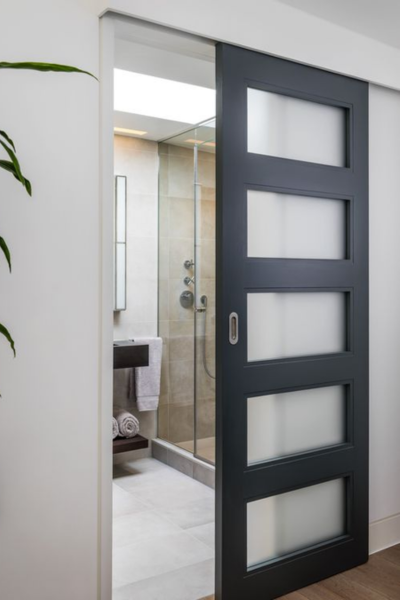 A frosted glass sliding door saves space while allowing light to flow through. Source: Perth Window & Door Replacement Company
Sliding Door Alternatives
Replace your traditional swinging door with a space-saving pocket door that slides into the wall. Barn doors offer another stylish option that glides along an exposed track without taking up valuable floor space. For a modern touch, try installing frosted glass sliding doors that add privacy while letting natural light flow through. If structural limitations prevent in-wall installation, opt for bypass doors that slide in front of each other, requiring only half the clearance space of standard doors.
Strategic Door Swing Solutions
If you’re stuck with a swinging door, switch its direction to open outward into the hallway instead of inward. This simple change can free up to 9 square feet of usable bathroom space. Install door-mounted organizers or towel racks on the bathroom side to maximize every inch. Consider replacing full-size doors with narrower 28-inch versions, which still meet code requirements while saving precious space. Position your door to create a natural flow, avoiding conflicts with fixtures like vanities or toilet placement.
Incorporating Multi-Functional Elements
Transform your small bathroom into a powerhouse of efficiency by choosing elements that serve multiple purposes.
 A multifunctional faucet with pull-out sprayer adds versatility to a small bathroom sink. Source: Amazon
Convertible Storage Solutions
Install a fold-down shower bench that doubles as seating and a spot for shower items when you need it. Mount a retractable clothesline above your tub that disappears when not in use but provides instant drying space for delicates. Add magnetic strips behind your medicine cabinet door to hold small metal items like tweezers and bobby pins. Consider a tilt-out hamper built into your vanity that saves floor space while keeping dirty clothes out of sight. Install pull-out drawers in the toe-kick area under your vanity for extra storage of rarely used items.
Dual-Purpose Fixtures
Choose a vanity mirror that opens to reveal built-in storage while providing your daily reflection. Install a shower panel system that includes both a rainfall showerhead and handheld sprayer with built-in toiletry niches. Opt for a toilet with a sink on top that uses greywater from handwashing to fill the tank, saving both space and water. Select a shower door that features a full-length mirror on the outside, eliminating the need for additional wall mirrors. Add LED light strips to your shower niche that serve as both task lighting and ambient mood lighting.
Utilizing Natural and Artificial Light
Proper lighting transforms a small bathroom from cramped to spacious while creating an inviting atmosphere.
Window Placement Strategies
Make the most of your bathroom’s natural light by keeping windows unobstructed. Install frosted privacy film instead of heavy curtains or blinds to maintain privacy without blocking sunlight. For basement bathrooms, consider adding a solar tube or skylight to bring in natural light from above. Position your vanity and mirror adjacent to the window rather than directly across to maximize light distribution. If you’re renovating, opt for larger windows or glass blocks that let in more light while maintaining privacy. Add reflective surfaces like glossy tiles or metallic fixtures near windows to bounce light throughout the space.
Strategic Mirror Positioning
Place a large mirror above your vanity to double your visual space and reflect maximum light. Install strip lighting around your mirror’s edges to eliminate shadows on your face while adding ambient glow.
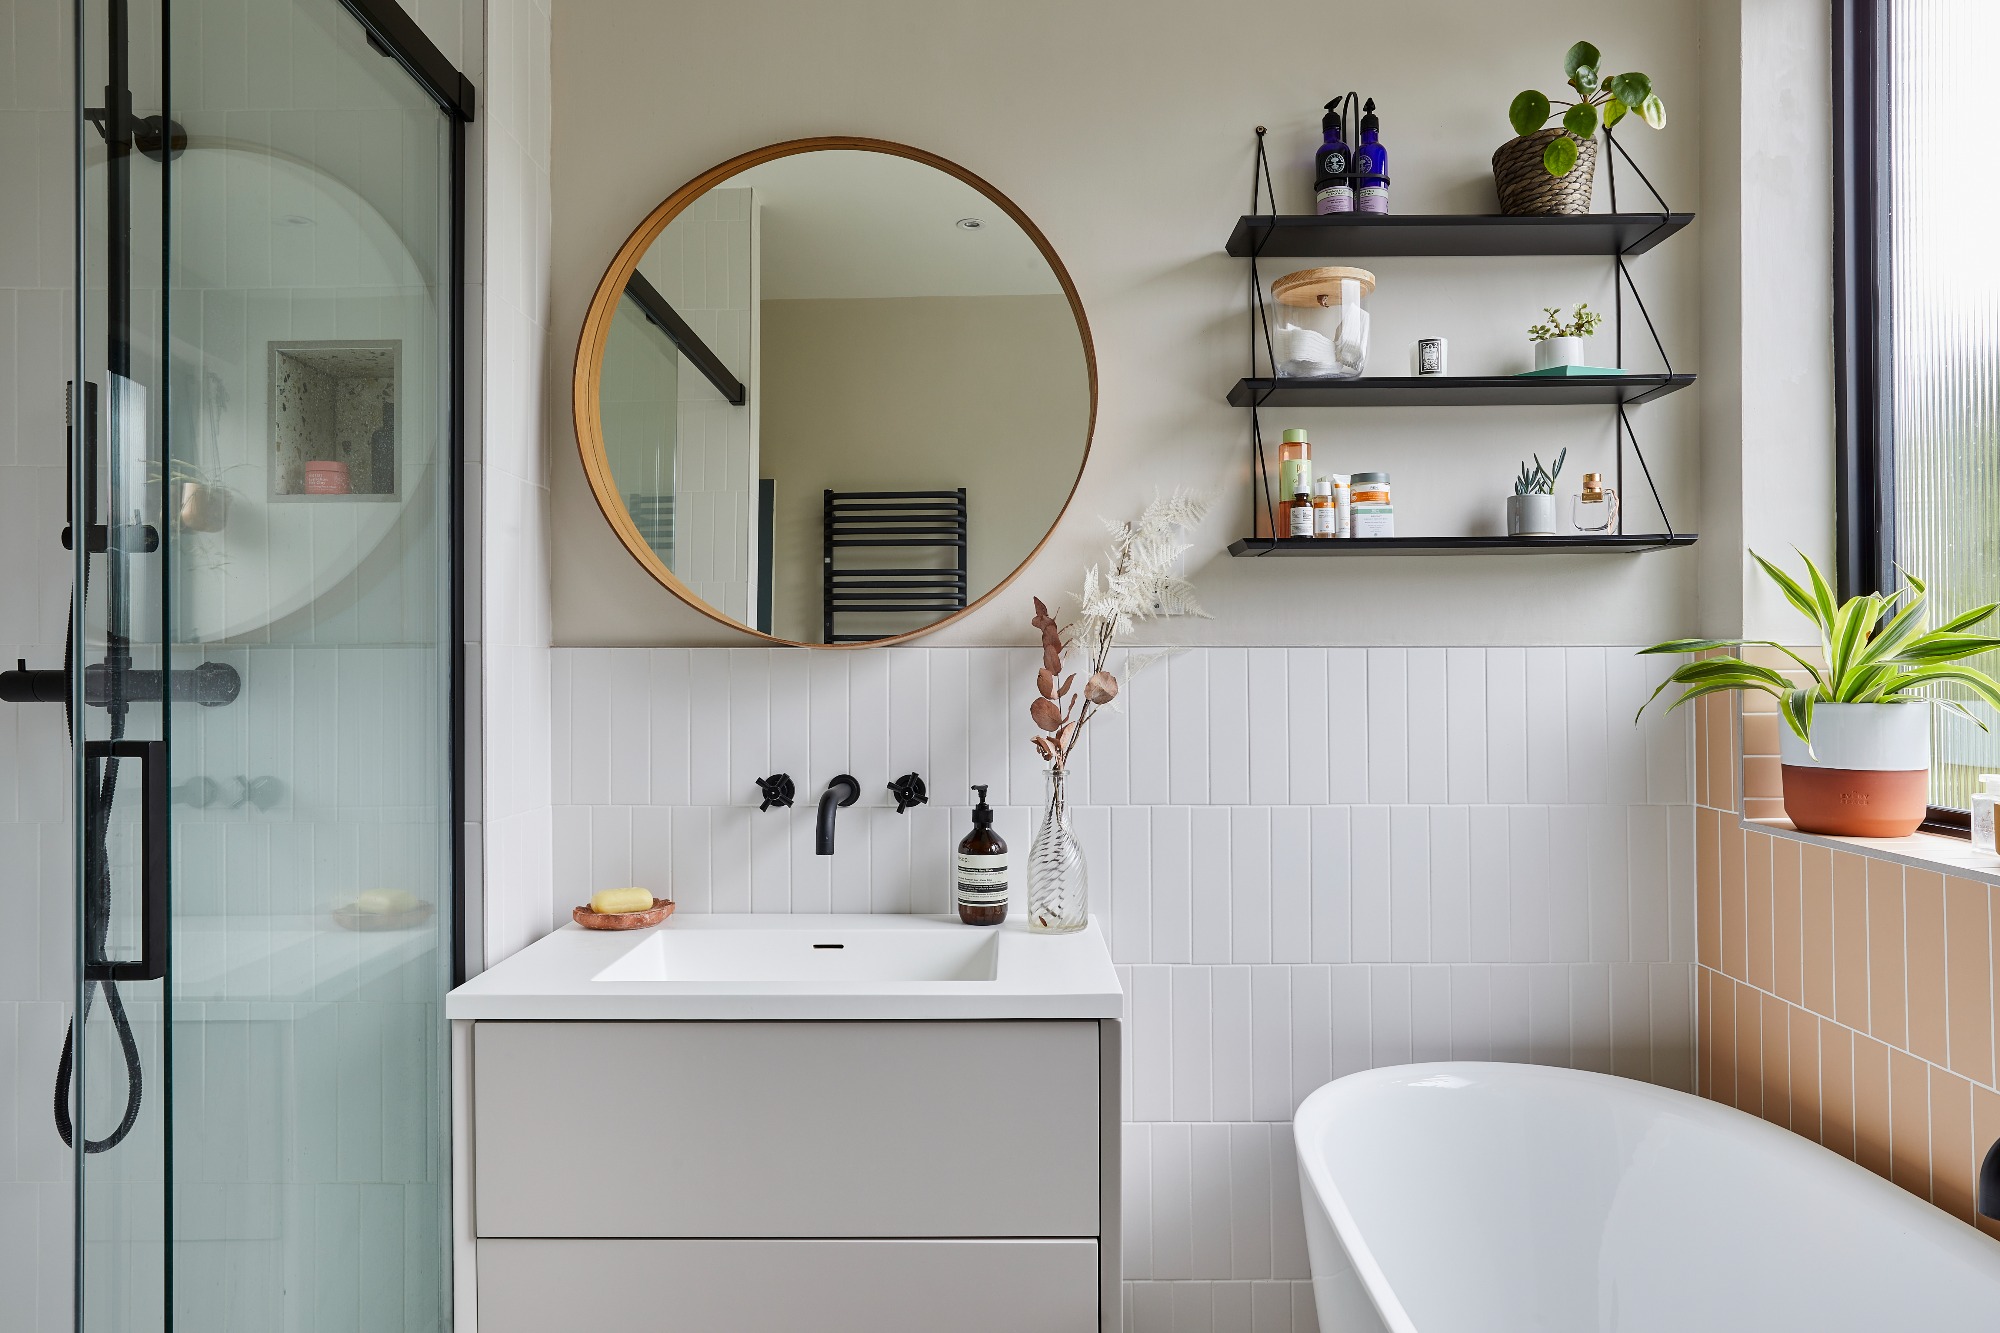 Strategic mirror placement with good lighting enhances the sense of space in a small bathroom. Source: Real Homes
Consider adding a second mirror on the opposite wall to create the illusion of infinite space and bounce light between surfaces. Full-length mirrors work wonders when mounted on the back of your bathroom door or on a blank wall. For awkward corners, use custom-cut mirrors to fit the space perfectly. Pair mirrors with light-colored walls and reflective tiles to amplify both natural and artificial light throughout the room.
Selecting Space-Enhancing Materials
Transform your tiny bathroom into a roomier space by choosing materials that create depth and openness. Here’s how to select surfaces that maximize visual space:
Large-Format Tiles
Oversized tiles are your secret weapon for making small bathrooms feel bigger. By using tiles that measure 12×24 inches or larger, you’ll create fewer grout lines which reduces visual clutter.
 Large-format tiles create a seamless look with fewer grout lines, making the space appear larger. Source: Tile Outlets of America
Install these tiles from floor to ceiling to draw the eye upward, making your bathroom appear taller. For maximum impact, choose rectified tiles which can be placed closer together with minimal grout lines. Light-colored tiles in a matte finish work best as they won’t create distracting reflections while still opening up the space.
Reflective Surfaces
Strategic use of reflective materials can double your bathroom’s visual space. Install a frameless mirror that extends to the ceiling or spans the entire vanity wall. Opt for glossy ceramic tiles with a slight sheen or glass mosaic accents to bounce light around the room. Consider polished chrome or nickel fixtures that reflect light while adding contemporary style. Glass shower doors instead of curtains create an uninterrupted sight line making your bathroom feel more open. Remember to balance reflective surfaces with matte finishes to prevent an overwhelming glare.
Planning Smart Storage Solutions
Maximize every inch of your small bathroom with strategic storage solutions that blend seamlessly into your space while keeping essentials organized and accessible.
:strip_icc()/0576_220221_RSA_preview-c536a5e805fc459b9d2360ea3e777d7a.jpg) Built-in shower niches provide practical storage without protruding into the space. Source: Better Homes & Gardens
Built-in shower niches provide practical storage without protruding into the space. Source: Better Homes & Gardens
Built-In Niches and Recesses
Transform your bathroom walls into functional storage spaces with built-in niches. Install recessed shelving in shower walls to keep shampoo bottles, soap, and washcloths within easy reach without cluttering shower space. Create custom-sized niches between wall studs to store toilet paper, extra towels, or decorative items. Consider adding waterproof LED strips to illuminate these spaces, making them both practical and stylish. For shower niches, use tile that matches your walls to create a cohesive look while ensuring proper waterproofing with cement board backing and quality grout.
Hidden Storage Compartments
Get creative with concealed storage options that maintain your bathroom’s clean aesthetic. Install a medicine cabinet that sits flush with the wall, providing mirror functionality while hiding toiletries. Add a toe-kick drawer beneath your vanity for rarely-used items or cleaning supplies. Consider a sliding panel behind your mirror for additional hidden storage space. Use the space behind your toilet tank by installing a slim cabinet that appears built-in. These hidden solutions help maintain a clutter-free appearance while maximizing storage in unexpected places.
Designing for Long-Term Functionality
Future-proof your tiny bathroom by focusing on adaptable features that’ll serve you well for years. Install grab bars during initial construction (they can double as stylish towel racks) and choose slip-resistant flooring.
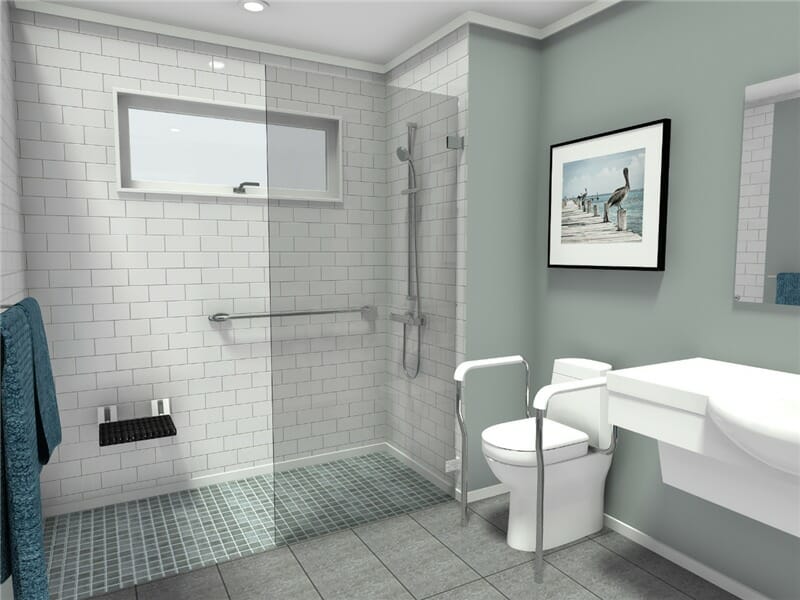 An accessible bathroom design with grab bars and shower seat provides long-term functionality. Source: RoomSketcher
Consider wider doorways of at least 32 inches to accommodate potential mobility needs and select fixtures with simple mechanisms for easy maintenance.
By implementing these nine layout ideas, you can transform your small bathroom from a cramped afterthought into a stylish, functional space that feels much larger than its actual dimensions. Remember that in small bathroom design, every inch counts—making thoughtful choices about fixtures, storage, and visual elements will help you create a bathroom that’s not only more spacious-feeling but also more enjoyable to use every day.