:max_bytes(150000):strip_icc()/SPR-ideas-options-for-landscape-edging-materials-2736792-hero-2c03b76e7acf40f69be77b68fb5dcb83.jpg)
6 Steps to Create a DIY Garden Layout That Works for You
Dreaming of a beautiful garden but not sure where to start? Creating your perfect DIY garden layout doesn't have to be overwhelming. With some simple planning and these easy-to-follow steps, you'll be on your way to growing your own slice of paradise.
Assessing Your Available Garden Space and Light Conditions
Before diving into garden design you’ll need to understand your available space and lighting to choose the right plants and layout.
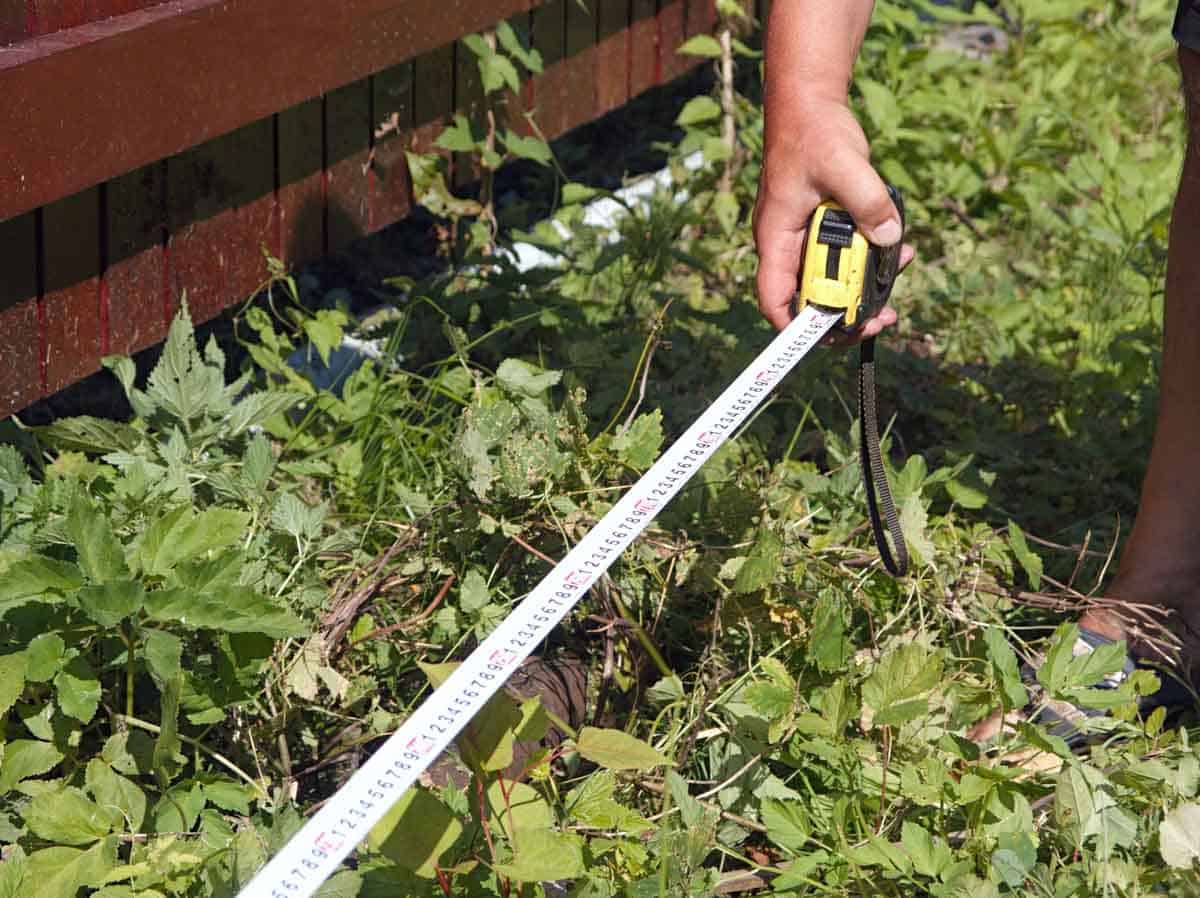 Measuring your garden area is the first essential step in planning your layout. Source: Growfully
Measuring Your Garden Area
Start by measuring the total square footage of your gardening space using a long tape measure. Note down both the length and width then multiply them together to get your working area. Don’t forget to account for existing features like trees patios or walkways that might limit your planting space. Create a simple sketch of your garden’s shape marking permanent structures utilities and property lines. If you’re working with an irregular space break it into smaller rectangles or squares to calculate the total area more easily.
Understanding Sun Exposure Patterns
Track how sunlight moves across your garden space throughout the day. Use your smartphone to take photos at different times (morning noon and late afternoon) for a week to identify sunny partially shaded and fully shaded areas. Most vegetables need 6-8 hours of direct sunlight while some plants thrive in partial shade. Pay attention to tall structures or trees that cast shadows as these patterns will change with the seasons.
:max_bytes(150000):strip_icc()/__opt__aboutcom__coeus__resources__content_migration__mnn__images__2017__03__sun-map-mosaic-05-23b8a600f6b54c73ba399bcde113774b.png) Sun mapping your garden by tracking how light patterns change throughout the day helps determine optimal planting locations. Source: Treehugger
Sun mapping your garden by tracking how light patterns change throughout the day helps determine optimal planting locations. Source: Treehugger
Create a simple sun map by marking sunny spots with yellow partially shaded areas with orange and shaded spots with blue on your garden sketch.
| Sun Exposure Type | Daily Sunlight Hours | Plant Types |
|---|---|---|
| Full Sun | 6+ hours | Vegetables tomatoes peppers |
| Partial Sun | 4-6 hours | Leafy greens herbs |
| Shade | Less than 4 hours | Ferns hostas |
Planning Your Garden’s Purpose and Function
Now that you’ve assessed your space and sunlight, it’s time to determine how you’ll use your garden to meet your specific needs and lifestyle.
Deciding Between Flowers, Vegetables, or Mixed Planting
Start by identifying your primary gardening goals. If you love cooking, a vegetable garden with herbs and edibles will provide fresh ingredients for your kitchen. For visual appeal, choose flowering plants that bloom in different seasons to create year-round color. Consider mixing both options with companion planting – like marigolds next to tomatoes or herbs alongside roses.
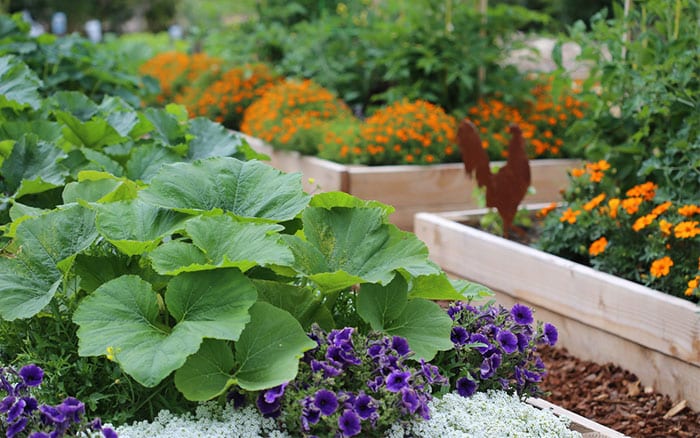 A beautiful mixed potager garden combining vegetables and flowers in an organized layout with raised beds. Source: David Domoney
Think about maintenance too: vegetable gardens need more frequent attention while flower beds might require less upkeep. Remember that each type needs different soil conditions and care routines so pick what fits your schedule.
Identifying High-Traffic Areas and Access Points
Map out the natural pathways through your garden space. You’ll need easy access to maintain your plants and harvest vegetables if you’re growing them. Place stepping stones or mulched paths between planting areas to prevent soil compaction. Consider where you’ll need to reach with a wheelbarrow or garden tools. Keep tall plants away from walkways to avoid blocking paths. Position frequently harvested items like herbs and salad greens near your kitchen door. Create wider paths (at least 3 feet) in main traffic areas and smaller paths (18-24 inches) between planting beds.
Sketching Your Basic Garden Design Layout
Now that you’ve assessed your space and identified your garden’s purpose it’s time to put your vision on paper with a practical design layout.
 A detailed hand-drawn garden design sketch showing planting areas, pathways, and key features. Source: Perrico Gardens
Creating a Scale Drawing
Start by converting your garden measurements to a scaled-down version on graph paper where each square represents a specific distance (like 1 foot). Draw your property lines first then add existing features such as buildings paths trees or utility boxes. Mark the sun exposure zones you identified earlier using different colored pencils or shading patterns. This visual reference will help you spot potential issues before you start digging.
Mapping Out Plant Zones
Divide your garden space into distinct planting zones based on your garden goals and maintenance needs. Create designated areas for vegetables herbs flowers and any special features like a compost bin or seating area. Keep tall plants in the back medium-height plants in the middle and shorter plants in the front to ensure proper visibility. Group plants with similar water and sunlight requirements together to make maintenance easier and more efficient.
Selecting Plants That Match Your Space and Climate
Choosing the right plants is crucial for a thriving garden that’s easy to maintain. Let’s explore how to select plants that will flourish in your specific environment.
:max_bytes(150000):strip_icc()/ms-usda-gardening-zone-3a925f9738ce4122b56cde38d3839919.jpg) USDA Plant Hardiness Zone Map helps gardeners select plants suited to their specific climate region. Source: Martha Stewart
USDA Plant Hardiness Zone Map helps gardeners select plants suited to their specific climate region. Source: Martha Stewart
Choosing Climate-Appropriate Plants
Your local climate zone determines which plants will thrive in your garden. Start by checking your USDA hardiness zone through the USDA website or local extension office to understand your area’s temperature ranges. Choose plants rated for your zone or one zone lower for better survival rates during harsh weather. Native plants are your best bet since they’re already adapted to local conditions including rainfall patterns seasonal changes & common pests.
Look for plants that match your sun exposure zones – shade-loving plants like hostas for darker areas & sun-loving vegetables for bright spots you’ve mapped out. Consider mature plant sizes too ensuring they’ll fit comfortably in your designated spaces.
Grouping Plants by Water Needs
Create hydrozones by grouping plants with similar water requirements together. This smart watering strategy helps prevent both overwatering & underwatering. Place high-water-need plants like vegetables & moisture-loving flowers in one area. Group drought-resistant plants like lavender rosemary & native grasses in another section. Position thirsty plants at the lowest point of your garden where water naturally collects.
Install your irrigation system to match these zones using different watering schedules for each group. This approach not only saves water but also makes maintenance easier since you can water each zone according to its specific needs rather than treating your entire garden the same way.
Installing Essential Garden Infrastructure
Before planting your garden, you’ll need to set up crucial infrastructure elements that support your garden’s long-term success and maintenance.
:strip_icc()/102871478-ff51eed7b5bd471cb7d9bb56a22e52e9.jpg) A drip irrigation system delivers water directly to plant roots while minimizing waste and preventing leaf diseases. Source: Better Homes & Gardens
A drip irrigation system delivers water directly to plant roots while minimizing waste and preventing leaf diseases. Source: Better Homes & Gardens
Setting Up Irrigation Systems
Start by installing a reliable watering system that matches your garden’s needs. For smaller gardens, connect a programmable timer to your outdoor spigot with a drip irrigation system or soaker hoses. Position the main water line along your garden’s edge then run smaller distribution tubes to each planting zone. Install drip emitters near plant roots spacing them 12-18 inches apart for optimal coverage. Consider using a rain sensor to prevent overwatering during wet weather.
| Irrigation Type | Best For | Water Efficiency |
|---|---|---|
| Drip System | Vegetables & Shrubs | 90% |
| Soaker Hose | Flower Beds | 85% |
| Sprinklers | Lawns | 75% |
Building Pathways and Borders
Map out your paths using garden hoses or rope to visualize traffic flow. Create main walkways at least 3 feet wide for wheelbarrow access and secondary paths 18-24 inches wide between planting beds.
Various edging materials create clear borders between pathways and planting areas while preventing grass invasion. Source: The Spruce
Layer your paths with landscape fabric topped with 2-3 inches of gravel mulch or stepping stones. Edge your beds with weather-resistant materials like cedar boards plastic edging or stone pavers. Install edging 2-3 inches deep to prevent grass invasion and maintain crisp borders between different garden zones.
Implementing Your Garden Layout in Phases
Break down your garden implementation into manageable phases to avoid feeling overwhelmed and ensure success.
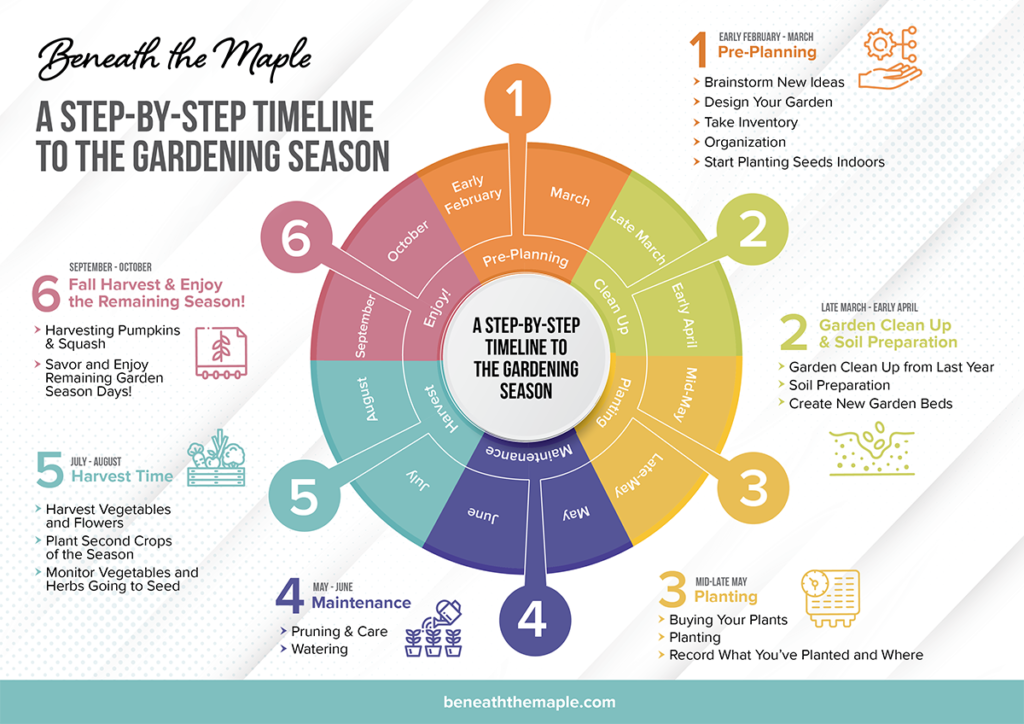 Breaking your garden project into scheduled phases makes implementation more manageable and increases success rates. Source: Beneath the Maple
Starting with Core Elements
Start by installing the essential components that form your garden’s foundation. Focus first on your irrigation system and main pathways since these are harder to modify later. Set up your composting area and build raised beds or prepare in-ground planting zones. Add basic soil amendments and install edging materials to define your garden spaces. Don’t forget to establish a designated tool storage area near your primary work zones for easy access.
Expanding Your Garden Over Time
Build on your garden’s core elements by adding new features each season. Begin with easy-to-grow plants that match your climate and gradually introduce more challenging varieties. Add vertical elements like trellises or arbors as your plants mature. Incorporate new garden beds when you’re comfortable managing existing ones. Install decorative elements like bird baths or garden art once your plants are established. Remember to evaluate what works each season and adjust your expansion plans based on your experience and available time for maintenance.
Making Your Garden Layout Work Long-Term
Keep your garden thriving by scheduling weekly maintenance tasks like weeding pruning and deadheading. Position annual vegetable beds where you’ll see them daily to stay on top of harvesting needs. Set reminders on your phone for seasonal tasks like mulching and fertilizing to maintain your garden’s health year-round.
Use garden journals or apps to track what works well in specific spots noting successes and challenges. Your observations will help you make smart adjustments each growing season maximizing your garden’s potential over time.