Sun Apr 06 - Written by: Denis Maina
15 Island Countertop Centerpieces to Impress Your Guests
Your kitchen island isn't just a workspace – it's the heart of your home where friends gather and family memories are made. A stunning centerpiece can transform this focal point into a conversation starter that'll make your guests say wow! the moment they walk in.
Want to take your kitchen’s style up a notch? Whether you’re hosting a dinner party or just making your daily coffee run more beautiful, we’ve rounded up 15 eye-catching centerpiece ideas that’ll work magic on your island countertop. From seasonal displays to year-round showstoppers, these picks won’t just look amazing – they’ll fit your style and budget too.
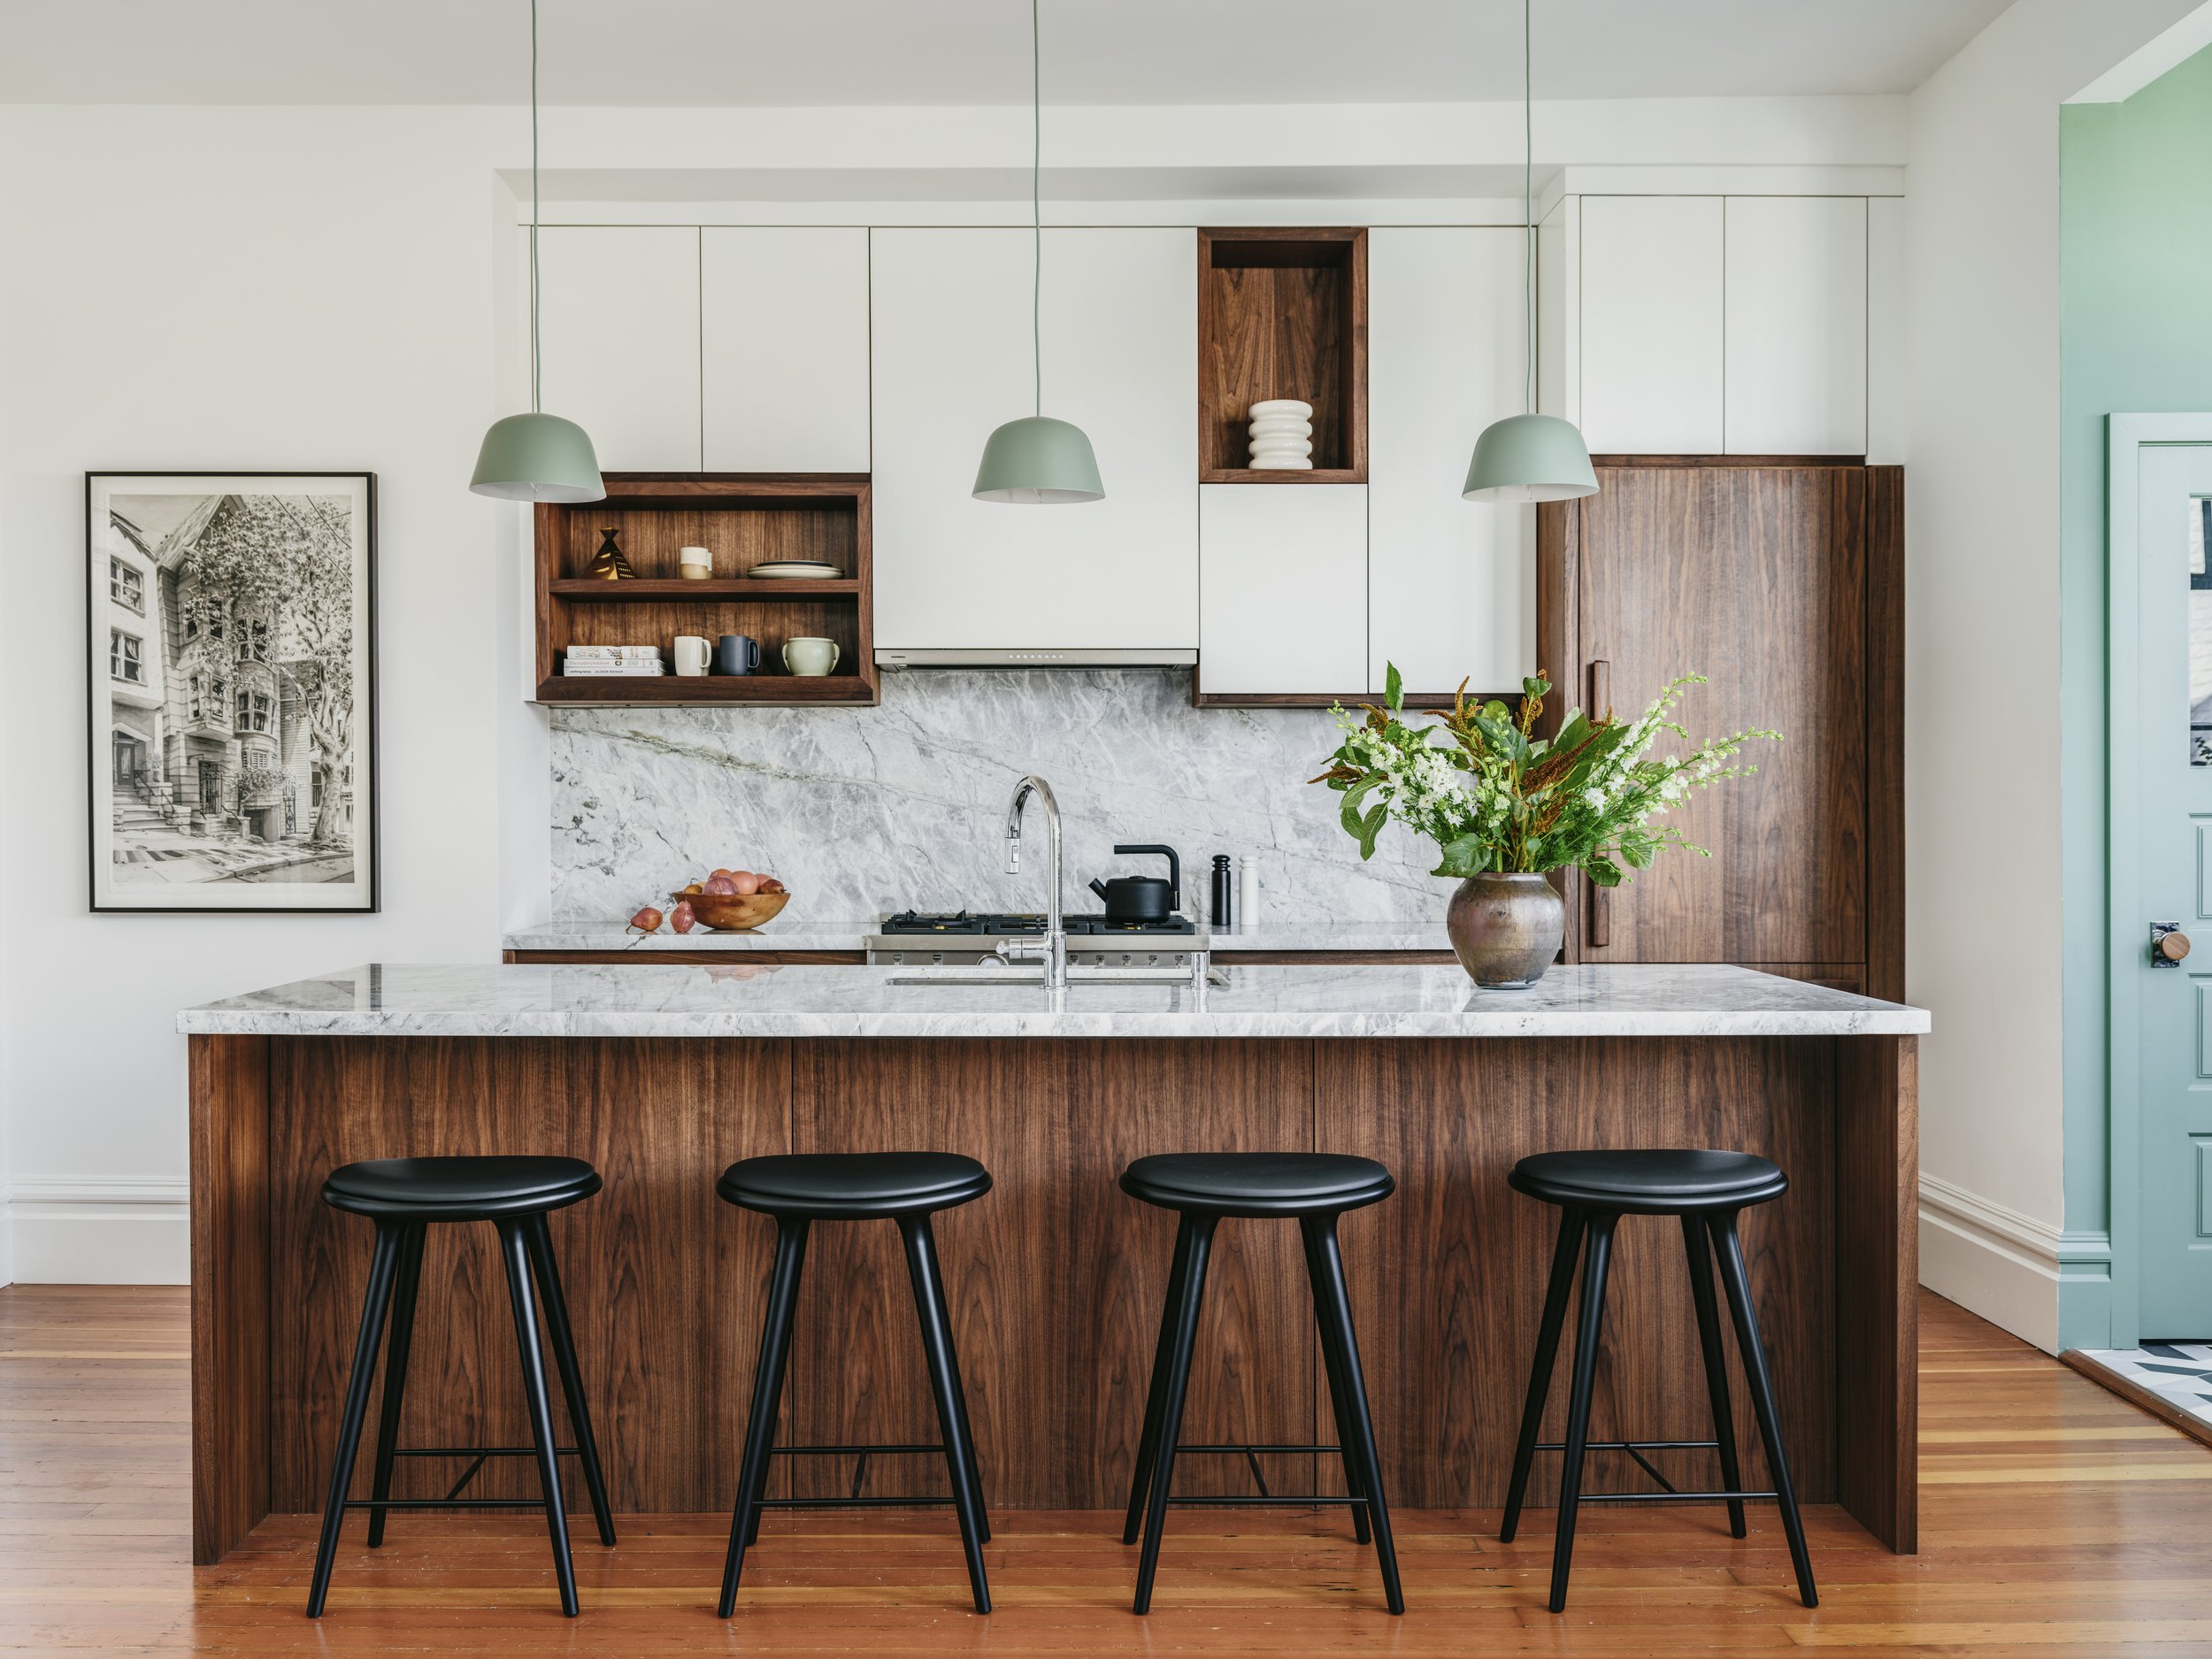
:max_bytes(150000):strip_icc()/1-69f68fe8416d45efb237fafe5f90a171.jpeg) A well-styled kitchen island centerpiece creates a striking focal point in your kitchen. Source: The Spruce
A well-styled kitchen island centerpiece creates a striking focal point in your kitchen. Source: The Spruce
Creating a Stunning Display: The Art of Island Countertop Centerpieces
Transform your kitchen island into a captivating focal point by mastering these simple display techniques. Start by selecting a centerpiece that matches your kitchen’s scale – larger islands need bolder pieces while compact spaces work best with smaller arrangements. Remember to maintain clear sight lines across your kitchen by keeping centerpiece heights between 12 and 18 inches.
Layer your display elements at varying heights to create visual interest. You’ll want to position taller items toward the center with shorter pieces radiating outward. Always leave enough functional counter space for food prep and casual dining.
- Group items in odd numbers (3, 5, or 7 pieces)
- Mix textures and materials for depth
- Choose pieces that complement your kitchen’s color scheme
- Rotate seasonal elements to keep displays fresh
This sophisticated kitchen island display demonstrates perfect scale with varied heights and complementary textures. Source: Livingetc
Fresh Herb Gardens in Decorative Containers
Transform your kitchen island into a functional herb garden that doubles as an impressive centerpiece while adding fresh flavors to your cooking.
Selecting the Right Herbs
Choose herbs that thrive indoors and match your cooking needs. Basil, oregano, and thyme are perfect starter options that grow well in kitchen conditions. Mint and rosemary add visual interest with their unique textures but need separate containers due to their spreading habits. Start with 3-5 different herbs to create an attractive display without overwhelming the space. Pick herbs that vary in height, leaf shape, and color to create visual drama. For best results, choose compact varieties like spicy globe basil or Greek oregano that won’t outgrow your island space.
 Fresh herbs arranged in decorative containers create a functional and beautiful kitchen island centerpiece. Source: Home with Holliday
Container Styling Tips
Select containers that complement your kitchen’s style while providing proper drainage. Mix metallic pots, concrete planters, or terra cotta containers in varying heights (4-8 inches) to create visual interest. Group containers in odd numbers like 3 or 5 for maximum impact. Add decorative rocks or moss as top dressing to hide soil and enhance appearance. Use matching saucers to protect your countertop and create a cohesive look. Consider elevated plant stands or tiered displays to add dimension while keeping herbs at different heights. Label your herbs with stylish markers that match your kitchen’s aesthetic.
 Mixed container materials add visual interest to this herb garden display with consistent styling elements. Source: Hello Hayley
Tiered Fruit and Vegetable Arrangements
Create stunning edible displays that combine form and function using multi-level stands or platters to showcase fresh produce. These arrangements serve as both decorative elements and convenient access to healthy snacks.
Color Coordination Strategies
Transform your island centerpiece into a visual feast by arranging fruits and vegetables in eye-catching color patterns. Start with a color wheel approach by grouping similar hues together like yellow lemons with golden pears, or creating striking contrasts with purple eggplants against bright orange citrus. Layer your display using the “rainbow method” – place red apples at the top tier, green kiwis in the middle, and blue-purple plums at the bottom. For a monochromatic look, stick to single-color produce in different shades like mixing green Granny Smith apples, honeydew melons, and limes. Add visual interest by incorporating white or neutral elements like cauliflower or mushrooms between vibrant produce sections.
 A tiered fruit display arranged by color creates an aesthetically pleasing kitchen island centerpiece. Source: Pinterest
Seasonal Produce Selection
Choose produce that reflects the current season to keep your arrangement fresh and cost-effective. In summer, display bright berries, peaches, and cherries on upper tiers with larger melons anchoring the bottom. Fall arrangements showcase apples, pears, and mini pumpkins in warm autumn tones. Winter displays can feature citrus varieties, pomegranates, and persimmons. Spring arrangements pop with fresh artichokes, asparagus, and early stone fruits. Remember to rotate items frequently, replacing any that show signs of ripening. Keep delicate items like berries and grapes on upper levels away from heavier produce that could crush them. Position frequently used items on easily accessible middle tiers for practical everyday use.
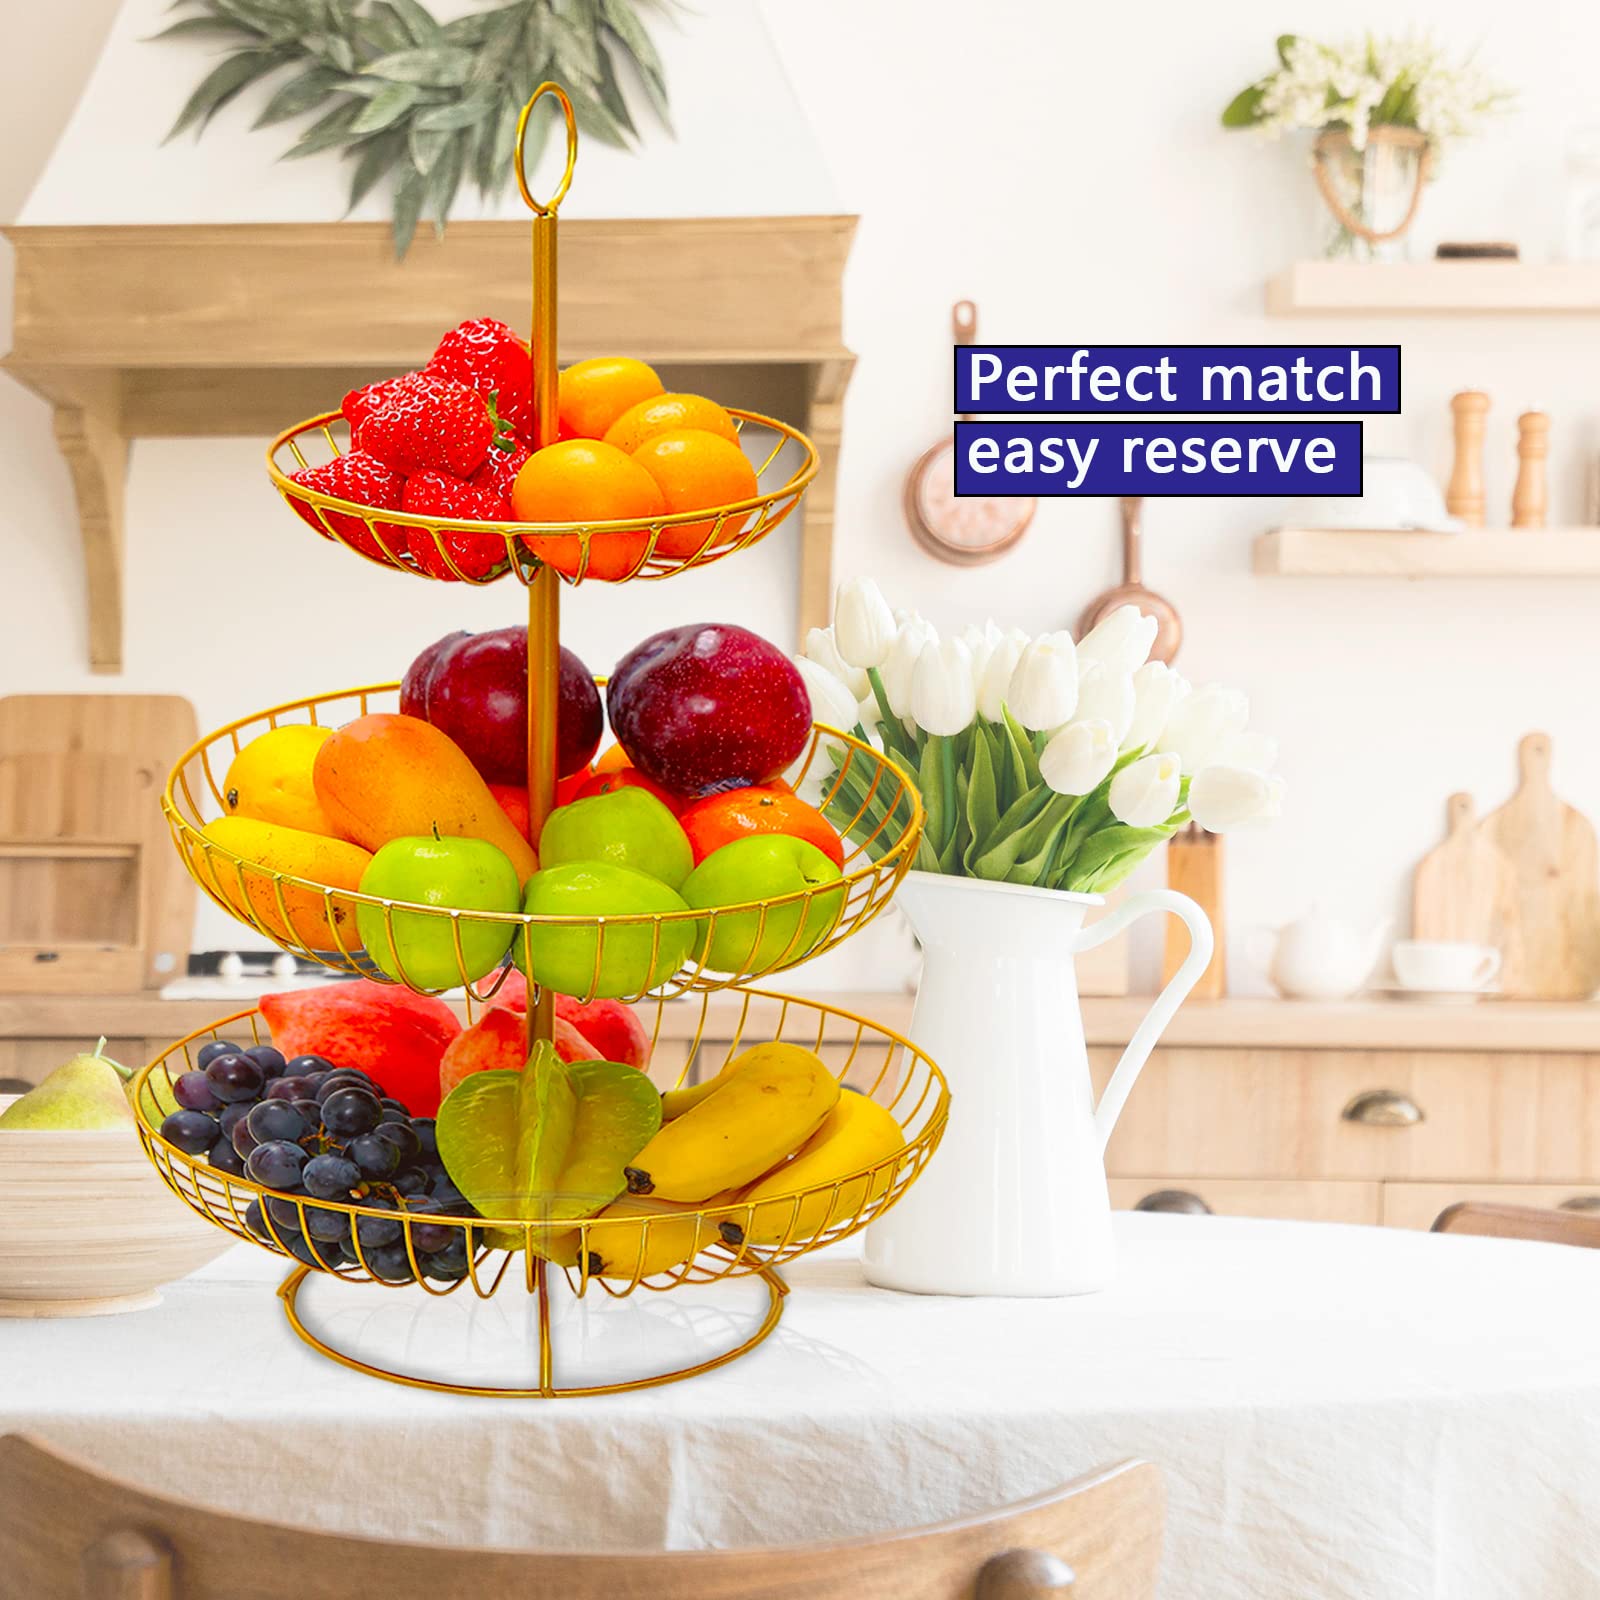 A three-tier fruit basket allows for practical organization of seasonal produce by weight and usage frequency. Source: Amazon.com
Artisanal Cutting Board Collections
Transform your kitchen island into a stunning showcase with a carefully curated collection of handcrafted cutting boards that combine form and function.
Mixed Material Combinations
Create visual interest by mixing different materials in your cutting board display. Start with a large walnut board as your anchor piece, then add variety with maple, bamboo, teak, or acacia woods. Pair smooth wooden surfaces with textured marble or slate boards for an eye-catching contrast. Position boards at varying angles – some flat, others propped against each other to create depth. You’ll want to include at least 3-5 boards in different sizes, shapes, and heights for the most striking effect. Consider boards with unique features like end-grain patterns, live edges, or inlaid materials to add character to your display.
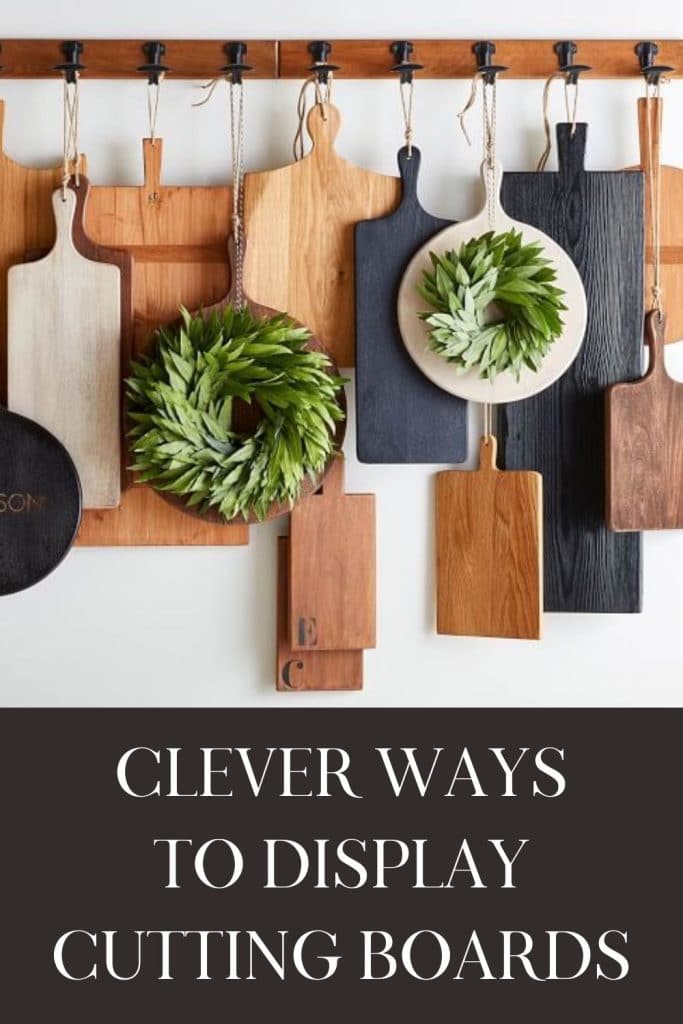 A collection of cutting boards in different wood tones and sizes creates an artisanal centerpiece with functional appeal. Source: Nourish and Nestle
Functional Display Ideas
Arrange your cutting boards to ensure they’re both beautiful and accessible for daily use. Stand larger boards vertically against the wall creating a backdrop while laying smaller ones flat for easy grabbing. Add practical elements like a knife block, ceramic utensil holder, or a small bowl of frequently used seasonings. Create zones by grouping boards by function – one area for bread, another for cheese, and a third for general prep work. Include a designated spot for a serving board that’s always ready for impromptu entertaining. Keep the arrangement fresh by rotating boards seasonally or based on your cooking needs.
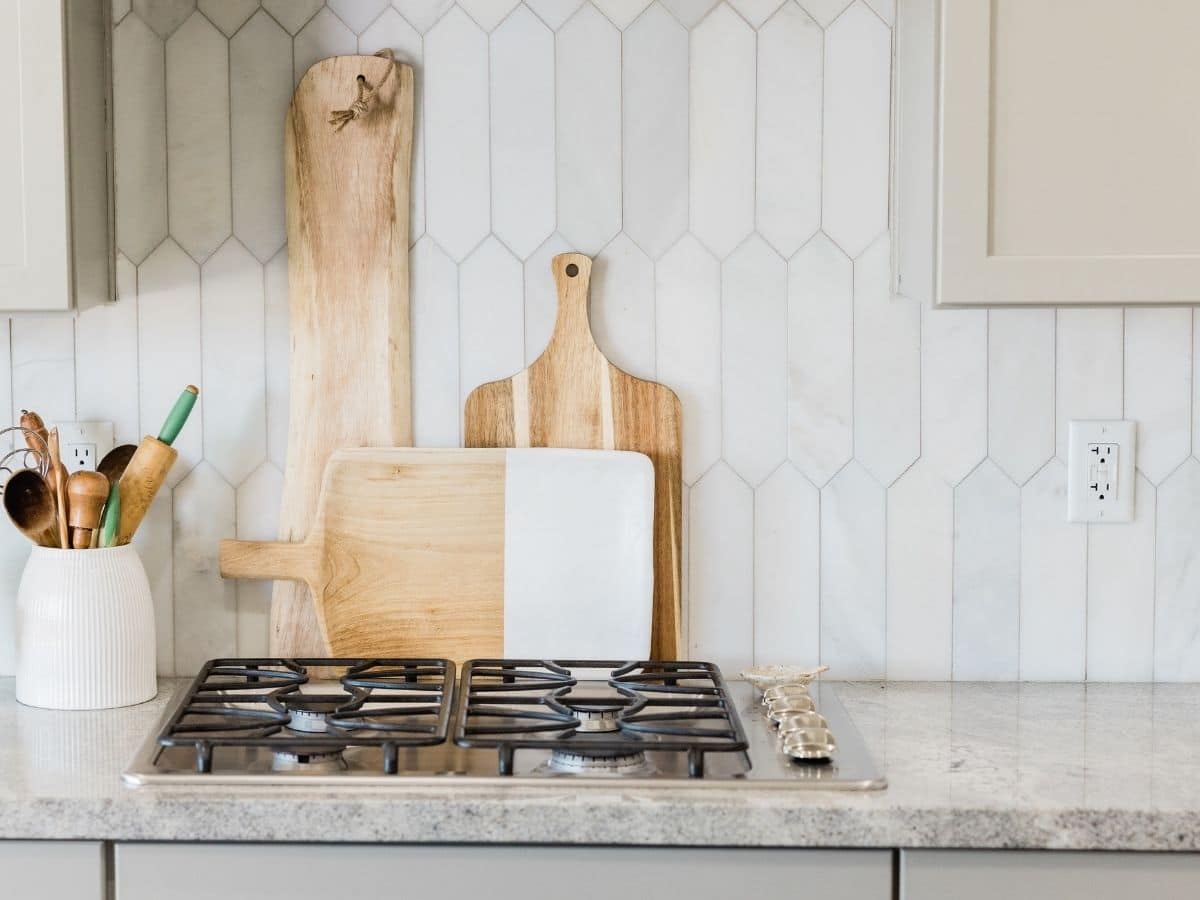 This functional cutting board arrangement incorporates both vertical and horizontal placement for visual interest and accessibility. Source: Nourish and Nestle
Designer Cake Stands and Pastry Displays
Elevate your kitchen island’s elegance with a curated collection of cake stands and pastry displays that serve both form and function.
Height Variation Techniques
Create visual drama by stacking cake stands of different heights to form an eye-catching display. Start with a large 12-inch pedestal stand as your base, then add medium-height stands at 8-10 inches and smaller 6-inch displays on top. Mix clear glass stands with metallic or ceramic pieces to add depth while maintaining sight lines across your island. Position taller pieces toward the back and shorter ones in front for a balanced look. Try the “triangle technique” by arranging three stands in varying heights to form an asymmetrical triangle shape that draws the eye naturally through the display.
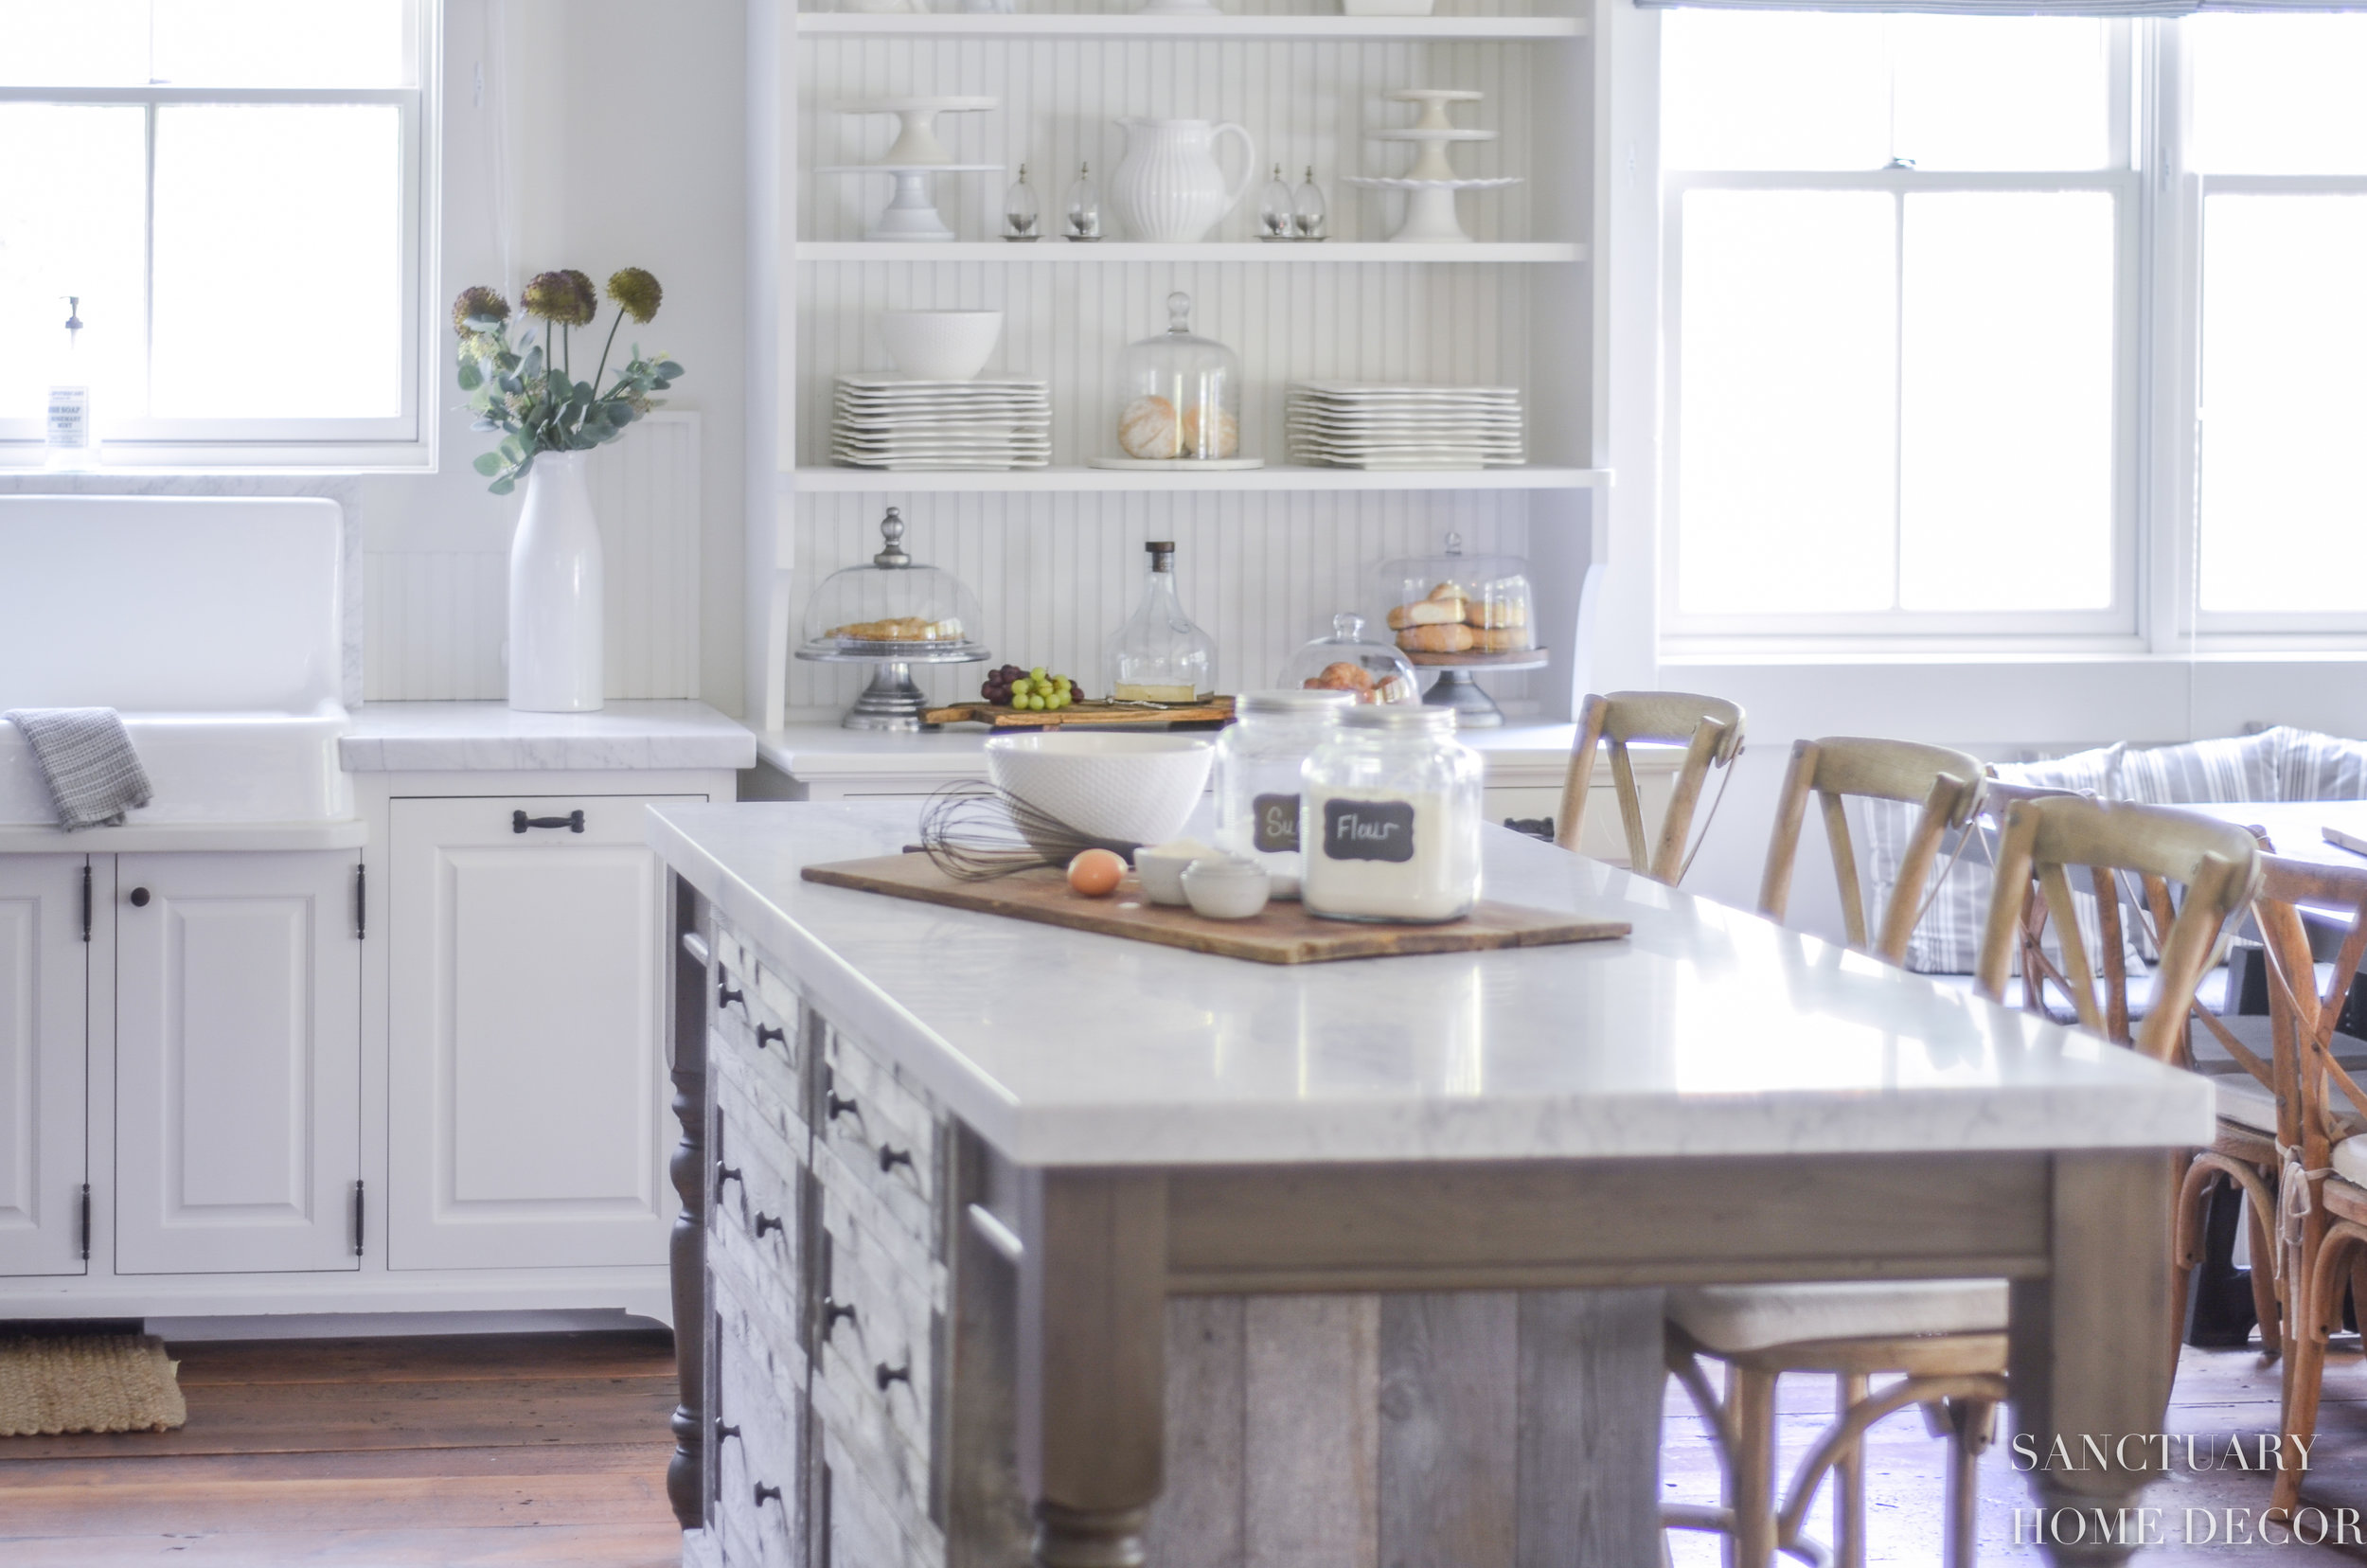 Multiple cake stands at different heights create an elegant display with visual interest. Source: Sanctuary Home Decor
Coordinating Styles
Match your cake stands to your kitchen’s existing design elements for a cohesive look. For modern kitchens, choose sleek metallic or glass stands with clean lines and minimal decoration. Traditional spaces work well with ornate ceramic or crystal stands featuring detailed patterns or scalloped edges. Mix materials like marble, brass, and glass to add visual interest but stick to a maximum of three different finishes. Consider incorporating stands in your kitchen’s accent colors or metallics that complement your hardware finishes. For added charm, display small dessert domes or cloches alongside your stands to protect treats while adding elegant detail.
 A glass cake stand with dome adds elegance while protecting pastries in this kitchen island display. Source: Amazon.com
Rustic Wine and Cheese Station Setups
Transform your kitchen island into an elegant wine and cheese station that combines rustic charm with sophisticated entertainment.
Wine Bottle Arrangements
Create visual impact by displaying wine bottles in rustic wooden crates or vintage metal wine racks. Position 3-5 bottles at varying heights using wooden blocks or stands to add dimension. Mix red and white wine bottles for color contrast while incorporating decorative elements like twine-wrapped bottles or dried grape vines. Add warmth with battery-operated copper wire lights woven between bottles or vintage-style LED candles. For a practical touch, include a wooden wine butler or trendy wine pearls in copper bowls. Keep the arrangement assymetrical using the rule of thirds and ensure labels face outward for easy selection.
 A rustic wine and cheese station combines functionality with decorative elements for an elegant kitchen island centerpiece. Source: DesignThusiasm
Cheese Board Styling
Start with a large wooden board as your base and create zones for different cheese types using fresh herbs as dividers. Arrange 3-4 varieties of cheese (soft creamy brie, aged cheddar, smoky gouda) in a clockwise pattern from mild to strong. Add pops of color with fresh figs, grapes, or dried fruit clusters. Include rustic touches like honeycomb, small mason jars of jam, or wooden bowls filled with nuts. Position cheese knives at practical angles and add small slate markers to identify cheese varieties. Keep the display at room temperature for 30-60 minutes before serving to enhance flavors and maintain an inviting appearance.
 A well-composed cheese board with herbs, fruits, and various cheese varieties creates an inviting kitchen island centerpiece. Source: DesignThusiasm
Vintage-Inspired Glass Cloches and Bell Jars
Glass cloches and bell jars bring timeless elegance to your kitchen island while protecting delicate displays from dust and kitchen splatter.
Creating Seasonal Vignettes
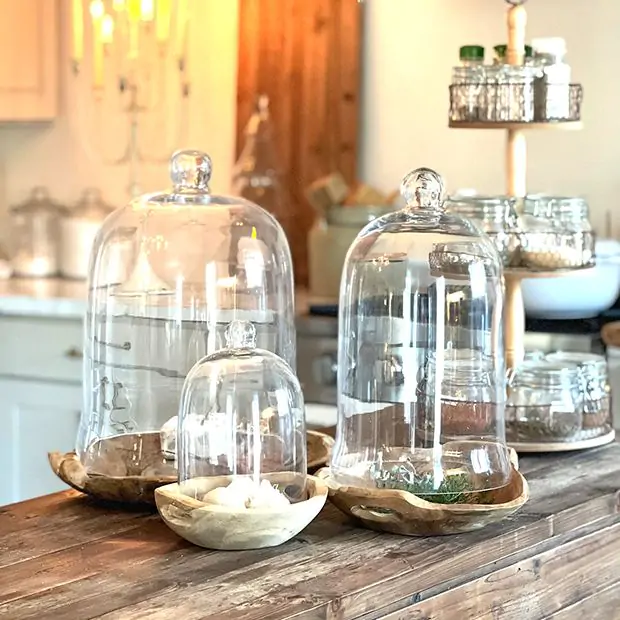
Transform your glass cloches into mini wonderlands that change with the seasons. For spring displays, place potted orchids or delicate air plants under your cloches paired with moss-covered stones. During summer, showcase fresh-cut garden flowers or collected seashells arranged on vintage silver trays. Fall vignettes can feature mini pumpkins, dried hydrangeas, or colorful maple leaves. For winter, create magical snow globe effects using bottle brush trees, mercury glass ornaments, and artificial snow. Keep your displays cohesive by limiting each cloche to 2-3 items and maintaining a consistent color palette within your seasonal theme.
 Glass cloches with wooden bases can house delicate seasonal vignettes on your kitchen island. Source: Amazon.com
Lighting Integration
Add drama to your cloche displays with strategic lighting elements. Battery-operated fairy lights woven through your vignettes create an enchanting glow especially during evening gatherings. Place LED pillar candles next to or under cloches to cast beautiful shadows across your island. For a modern twist, try LED light bases that illuminate your entire cloche from below. Mini battery-operated lanterns tucked into seasonal displays add warmth without fire hazards. Remember to hide battery packs behind decorative elements and change batteries regularly to maintain consistent lighting effects.
 Illuminated glass bell jars create magical displays that add ambient lighting to your kitchen island. Source: Antique Farmhouse
Modern Sculptural Vase Arrangements
Transform your kitchen island into a contemporary art display with carefully curated vase arrangements that combine form and function.
Minimalist Flower Selection
Choose single-stem flowers with strong architectural shapes like calla lilies, birds of paradise, or proteas. Opt for monochromatic blooms in white, cream, or deep jewel tones to maintain a sophisticated look. For maximum impact, select just 3-5 stems and position them at varying heights in your vase. Consider long-lasting varieties like orchids, anthuriums, or dried pampas grass that create stunning silhouettes while requiring minimal maintenance. Keep the arrangement clean and uncluttered by removing excess foliage and focusing on the natural lines of each stem.
 A simple, sculptural vase with minimalist flower arrangement creates a modern statement on this kitchen island. Source: Stefana Silber
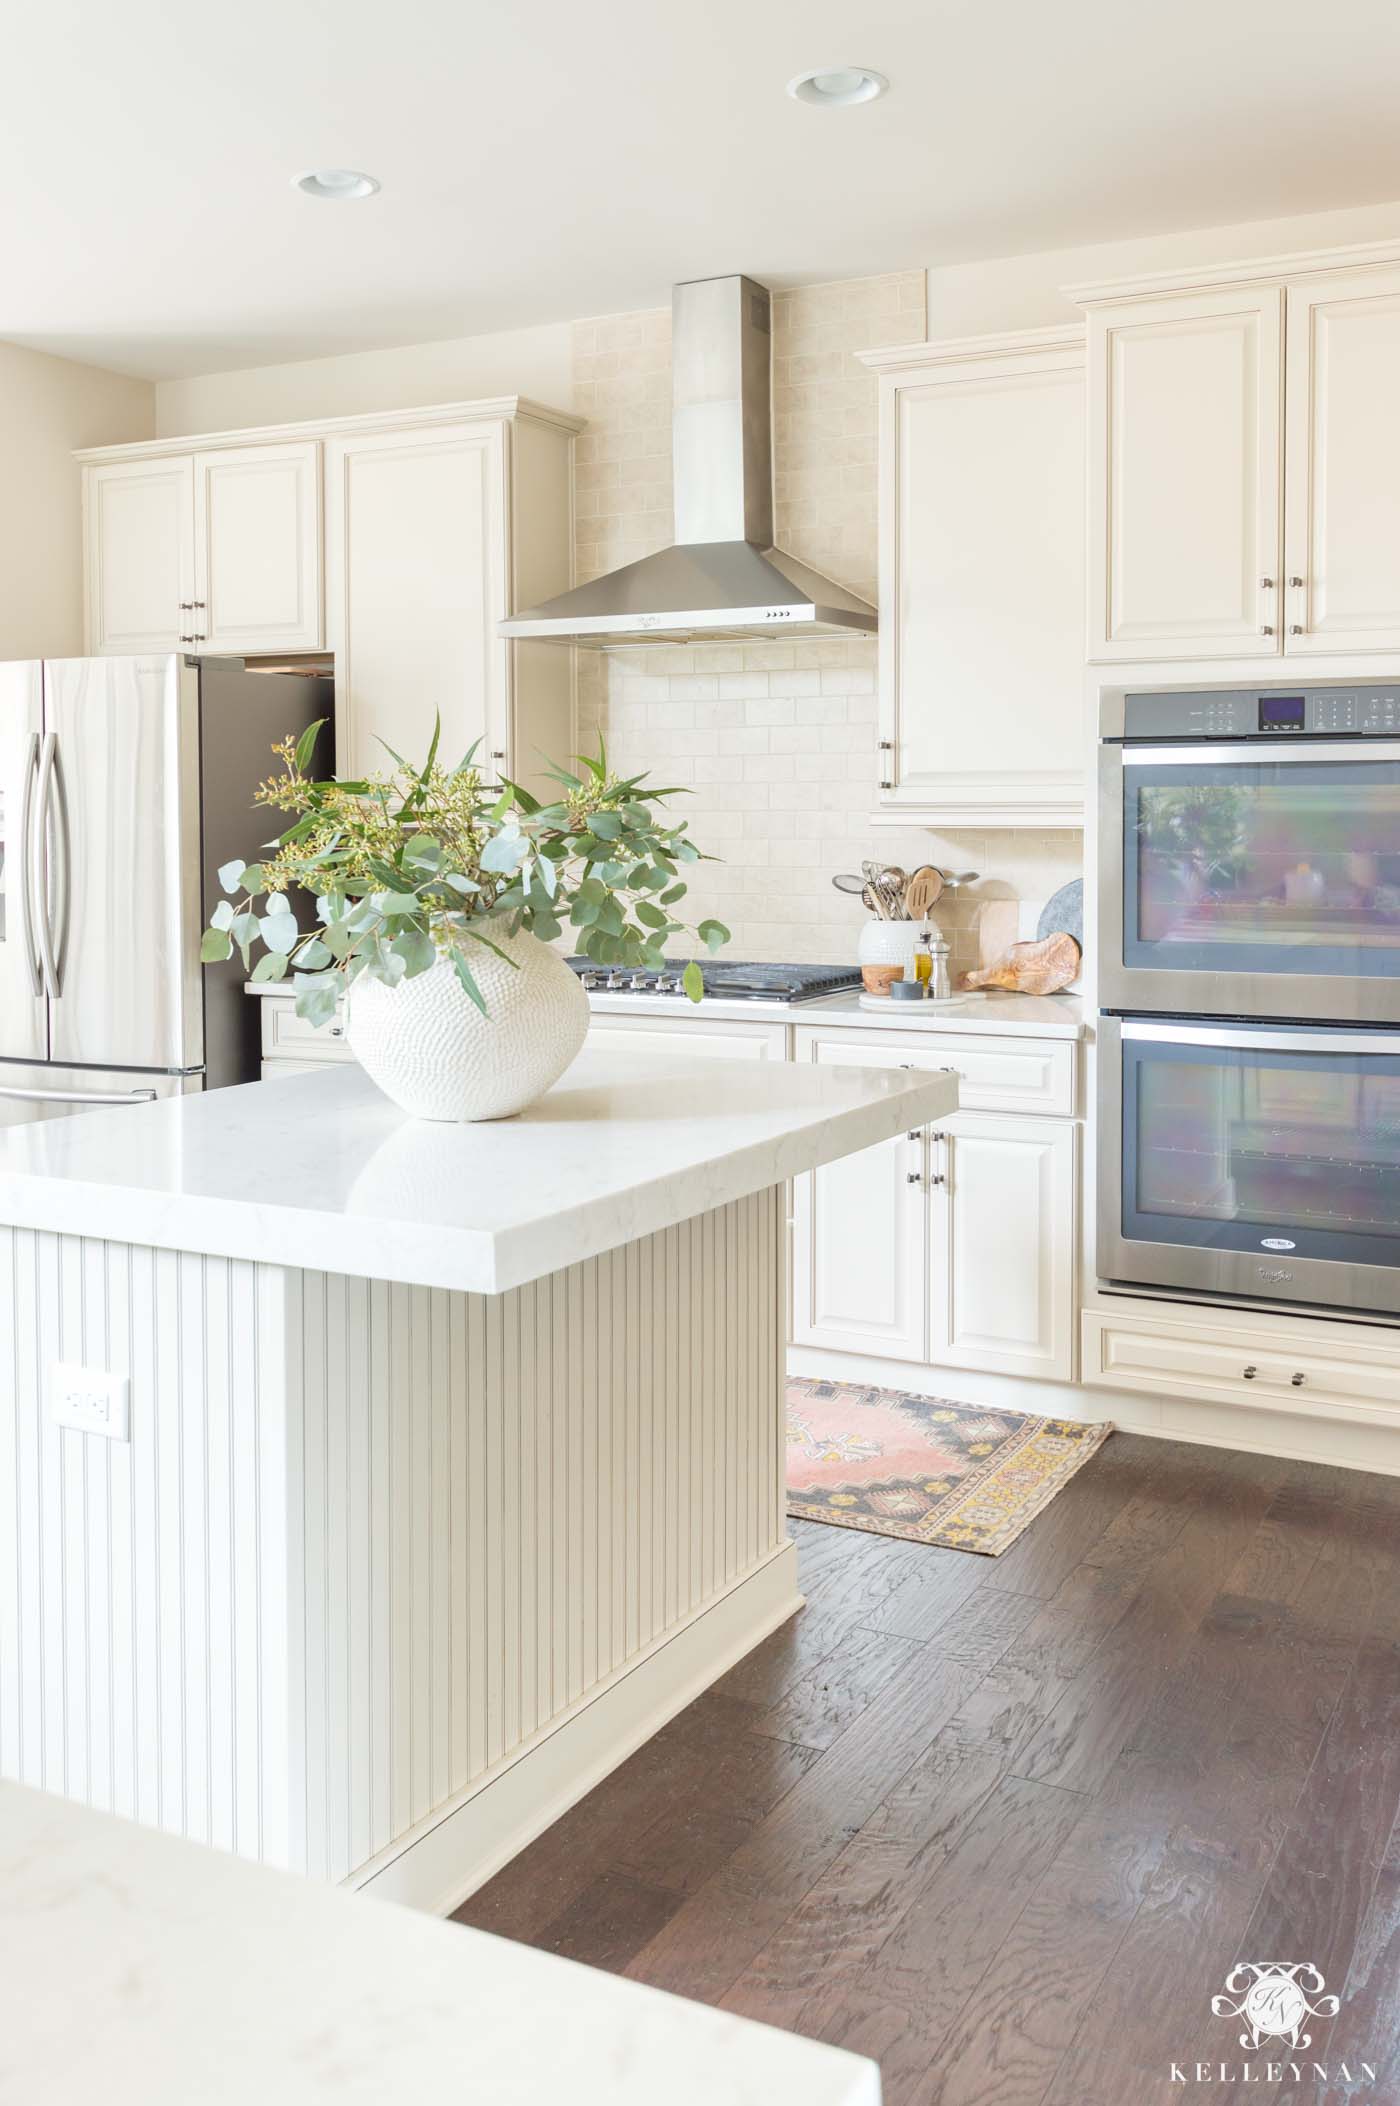
Contemporary Design Elements
Select sleek geometric vases in materials like brushed metal, matte ceramics, or smoky glass to anchor your display. Mix different heights and shapes while sticking to a coordinated color palette – try combining a tall cylinder vase with an asymmetrical bowl vase. Add visual interest with unexpected elements like polished river stones, chrome balls, or LED light bases. Position your vases in an off-center arrangement following the rule of thirds for a modern gallery-like effect. For added dimension, incorporate metallic finishes that reflect your kitchen’s lighting and complement your hardware.
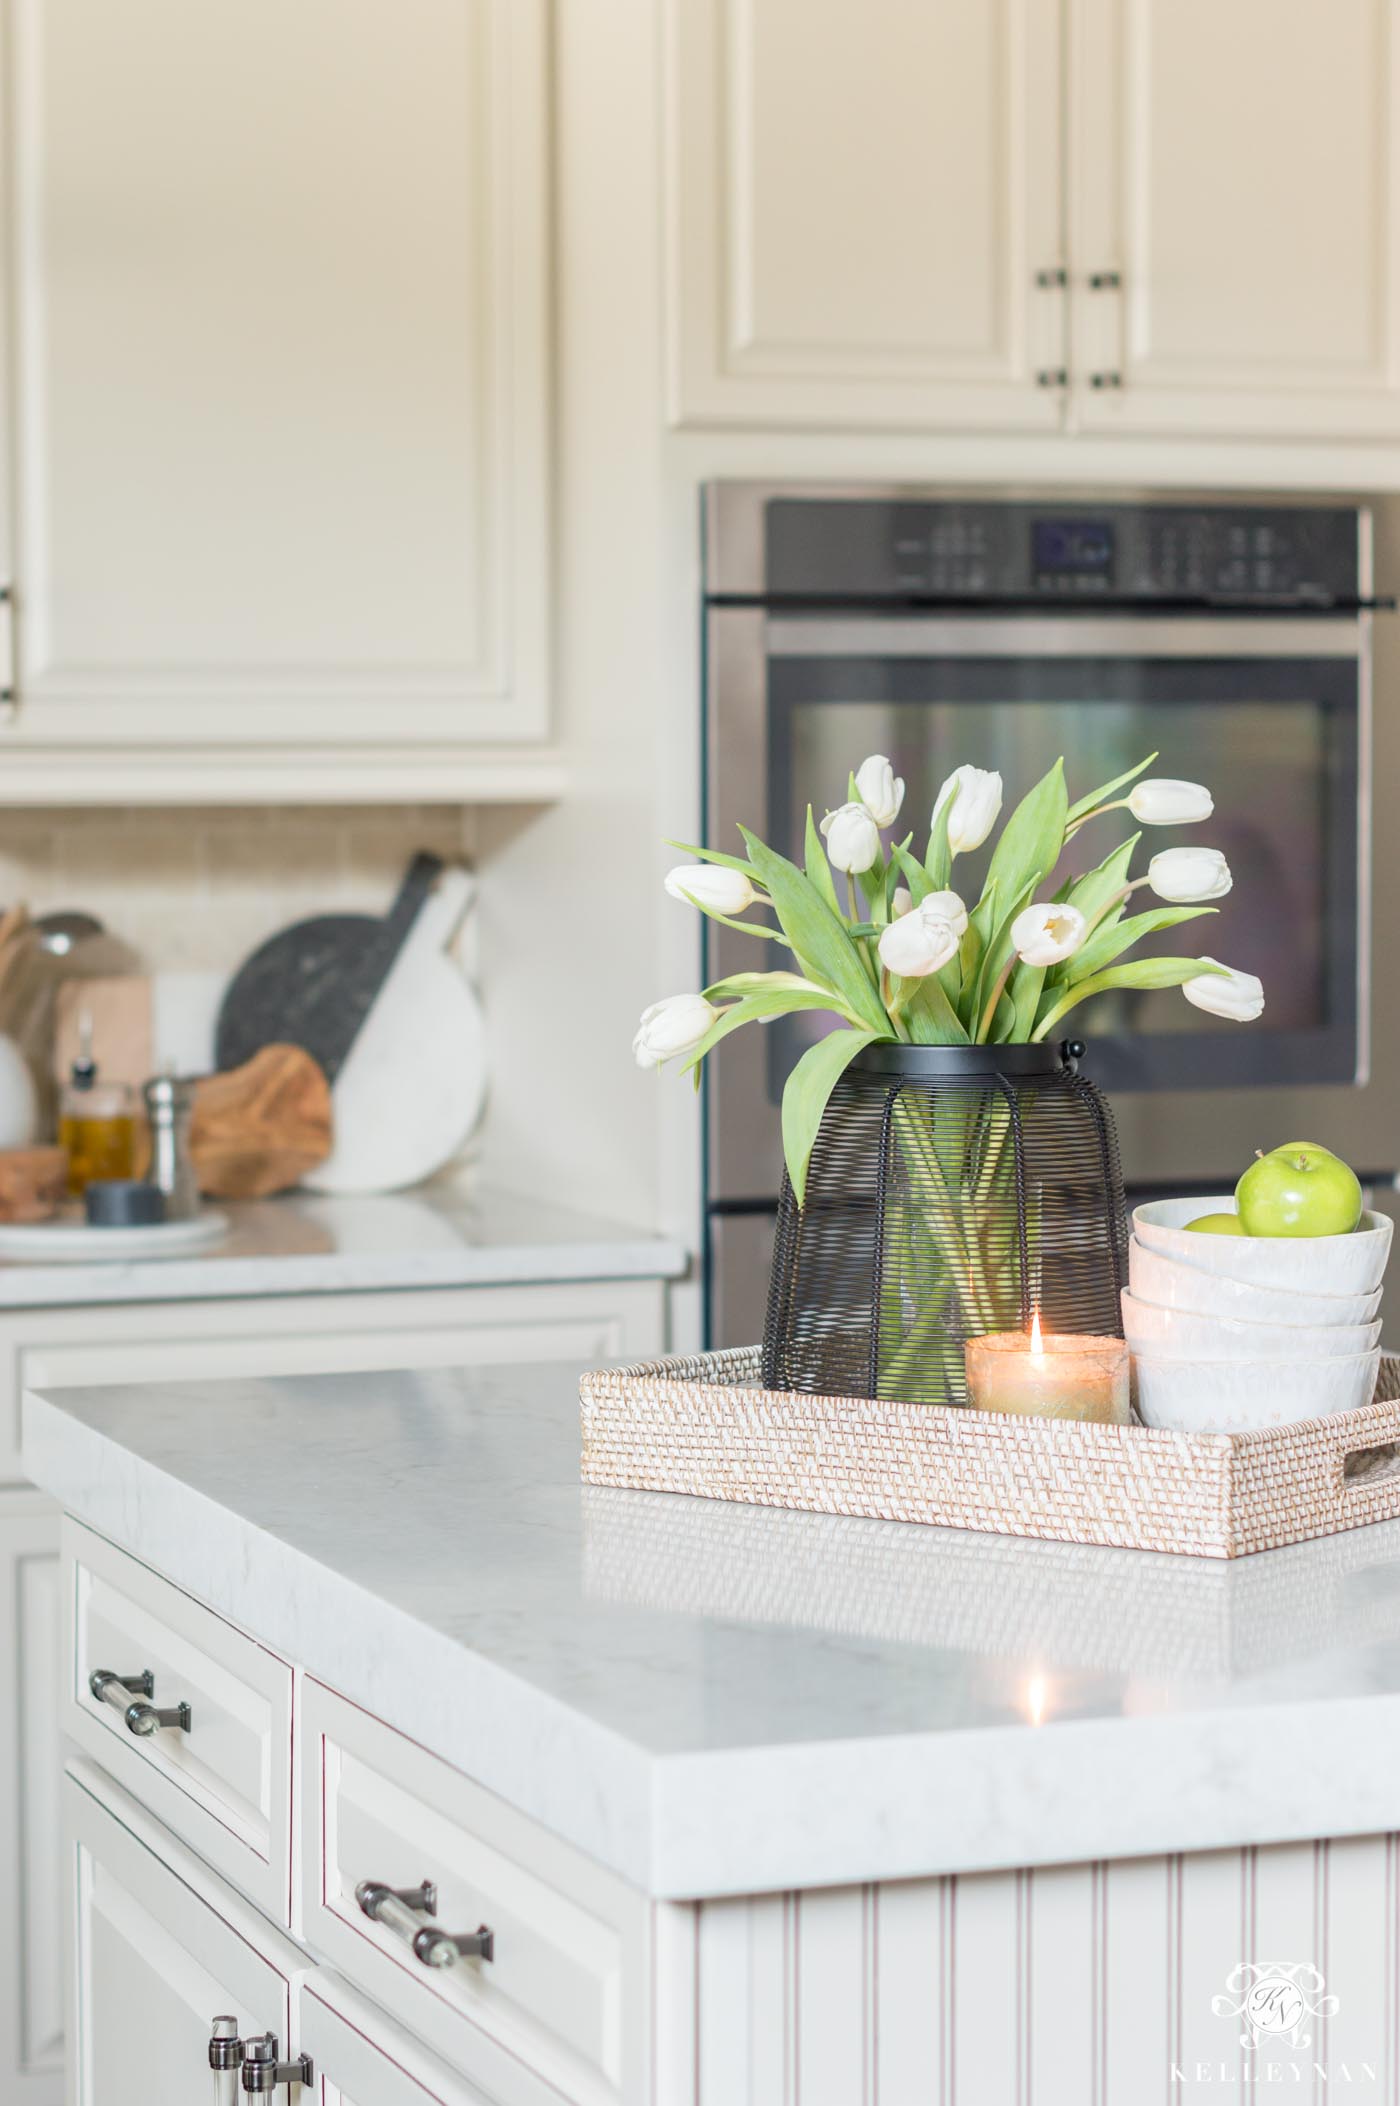 Contemporary vases in varying heights and complementary finishes create a sophisticated kitchen island centerpiece. Source: Kelley Nan
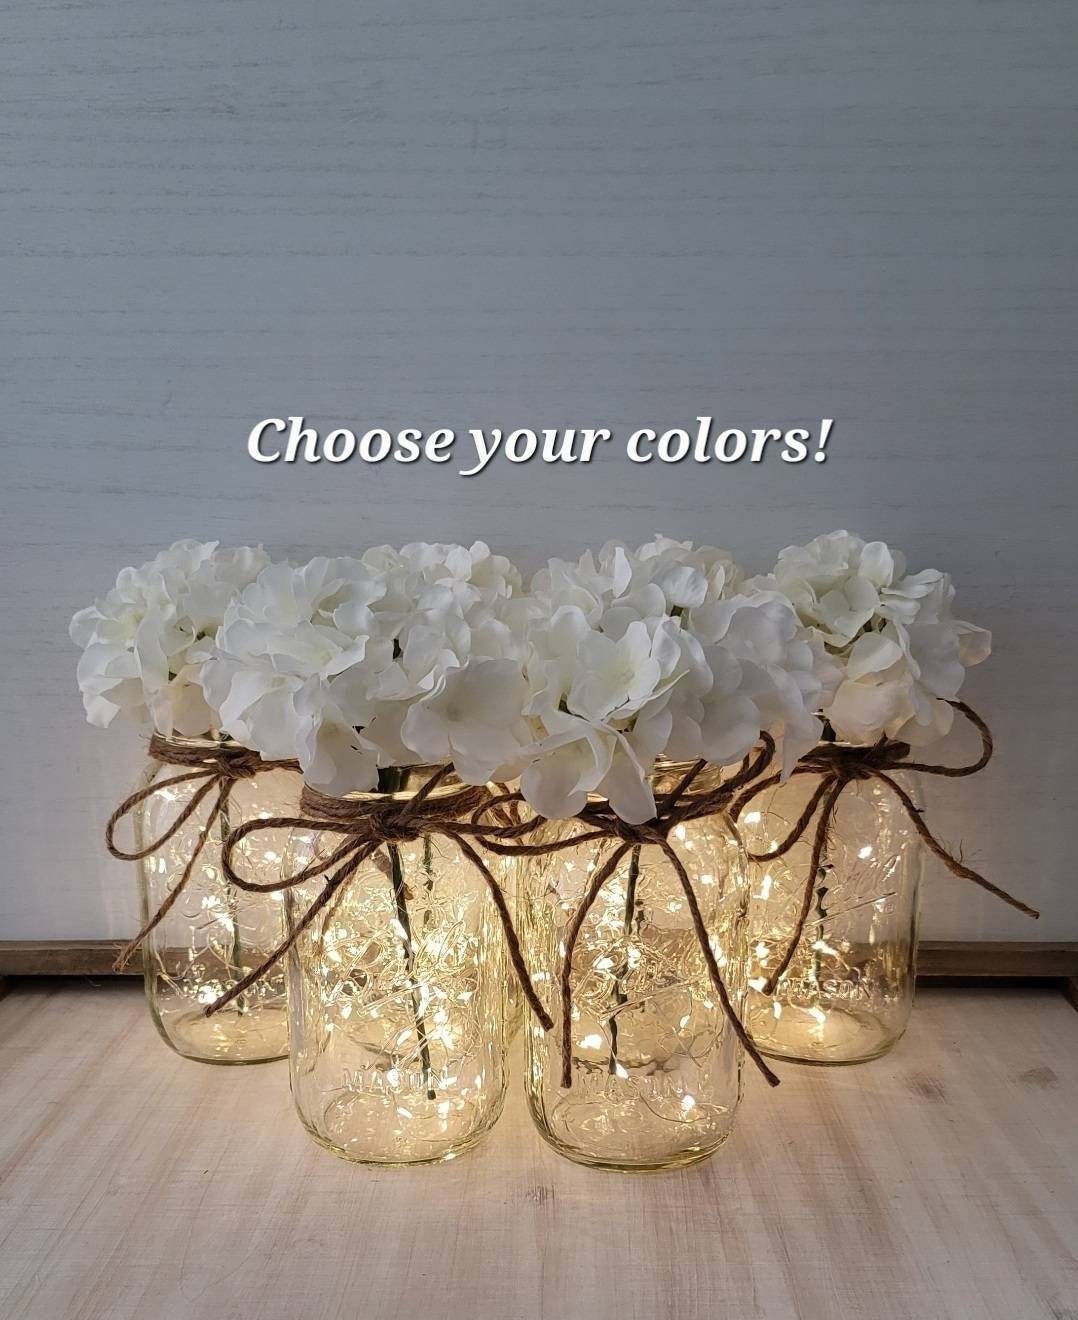
Farmhouse-Style Mason Jar Collections
Transform your kitchen island into a charming farmhouse display with vintage-inspired mason jar arrangements that blend rustic appeal with modern functionality.
Color Theme Coordination
Create a cohesive look by selecting mason jars in complementary tints like soft blue, aqua, smoky gray, or clear glass. Paint your jars with chalk paint in 2-3 shades that match your kitchen’s color scheme or stick to classic clear jars with white accents for a timeless appeal. Add depth to your display by mixing weathered metallic lids ranging from antique bronze to brushed nickel. Fill your jars with seasonal elements like white hydrangeas, baby’s breath, or dried wheat stalks to maintain your chosen palette. For added charm, wrap twine or burlap ribbon around jar necks using the same color family throughout.
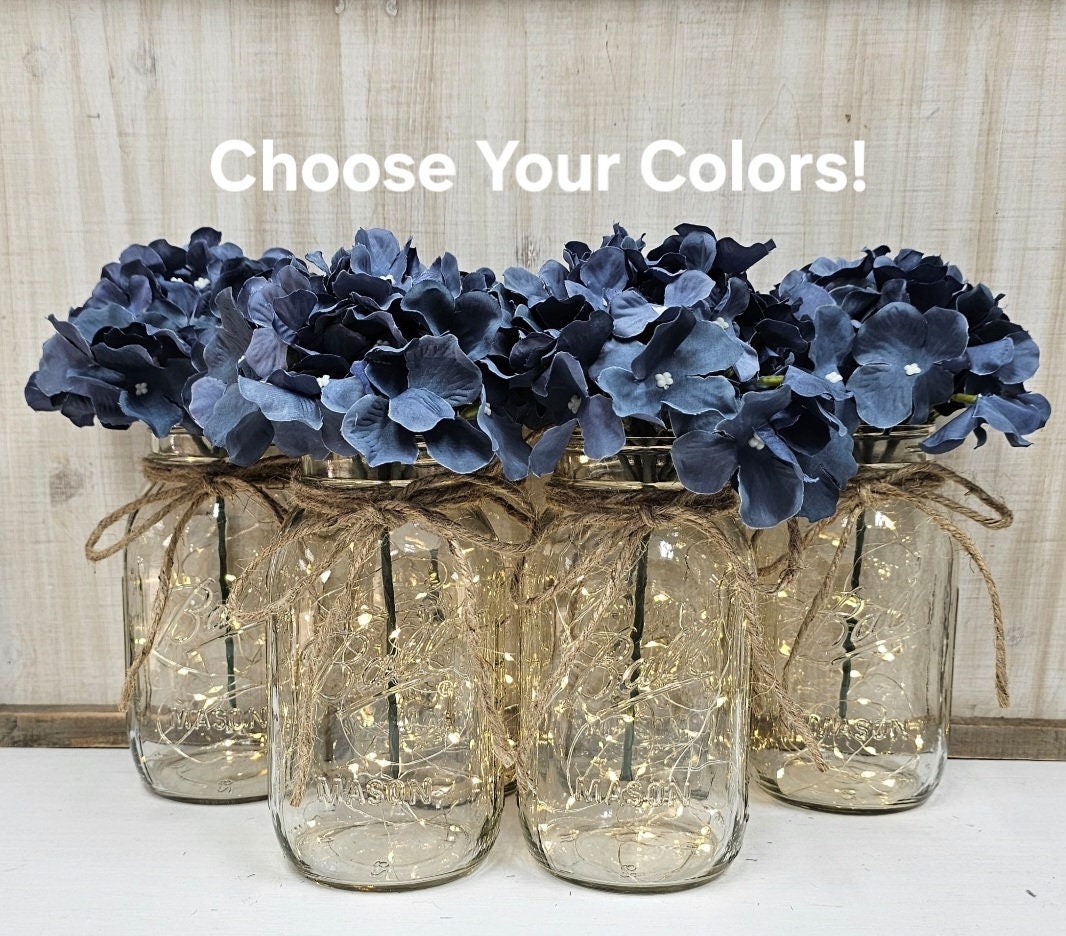 Coordinated blue-toned mason jars create a cohesive farmhouse-style centerpiece display. Source: Etsy
Mixed Height Arrangements
Start with 3-5 mason jars in different sizes from quart-sized down to small jelly jars. Position taller jars (12-15 inches) in the back then layer medium-height jars (8-10 inches) in the middle and shorter ones (4-6 inches) in front. Create instant height variation by placing some jars on vintage wooden crates or antique books. Add visual interest by filling taller jars with long-stemmed flowers, medium jars with cluster blooms and smaller jars with tea lights or short wildflowers. Remember to keep sight lines open by ensuring your tallest arrangements don’t block conversation across the island.
 Mason jars arranged at varying heights with complementary floral elements create depth and visual interest. Source: Etsy
Candle and Lantern Groupings
Transform your kitchen island into a cozy focal point with strategically placed candles and lanterns that create an enchanting atmosphere for evening gatherings.
Safety Considerations
Place candles at least 12 inches away from any overhead cabinets or pendant lights to prevent fire hazards. Use flameless LED candles when displaying near fabric or flammable materials. Keep all open flames away from dish towels, cooking oils & paper products. Choose sturdy lanterns with protective glass enclosures to prevent tipping. Place heat-resistant mats underneath hot candle holders to protect your countertop surface. Position lanterns away from high-traffic areas where guests might bump into them. Always extinguish real candles before leaving the room & never leave them unattended. Consider battery-operated options when children or pets are present.
 Safe lantern displays feature protective glass enclosures and sturdy bases for kitchen island use. Source: Amazon.com
Ambient Lighting Tips
Mix different sizes of lanterns & candle holders to create visual interest at varying heights. Group items in odd numbers (3 or 5 pieces) for the most appealing arrangement. Layer your lighting with tall pillar candles, medium-height lanterns & small votives. Choose metallic finishes like brass, copper, or bronze to reflect light & add warmth. Position larger pieces toward the center with smaller elements around the edges. Add dimension by incorporating frosted glass hurricane lamps for a soft glow. Use battery-operated twinkle lights inside lanterns for extra sparkle. Match your metallic finishes to existing kitchen hardware for a cohesive look.
 A varied arrangement of candles and lanterns creates warm ambient lighting on this kitchen island. Source: Kelley Nan
Decorative Bowl and Tray Combinations
Transform your kitchen island with stunning bowl and tray combinations that create depth while maintaining functionality.
Layering Techniques
Start with a large decorative tray as your base layer positioned at a slight angle for visual interest. Place a medium-sized shallow bowl off-center on the tray then add smaller bowls or decorative objects around it. Create height variation by stacking smaller trays on risers or using bowl stands to elevate certain pieces. Mix round and rectangular shapes to add dynamic contrast keeping the tallest items under 18 inches. Position items in triangular patterns using the rule of thirds to achieve perfect balance. For added dimension stack clear glass bowls within larger ceramic ones adding natural elements like citrus fruits or decorative balls between layers.
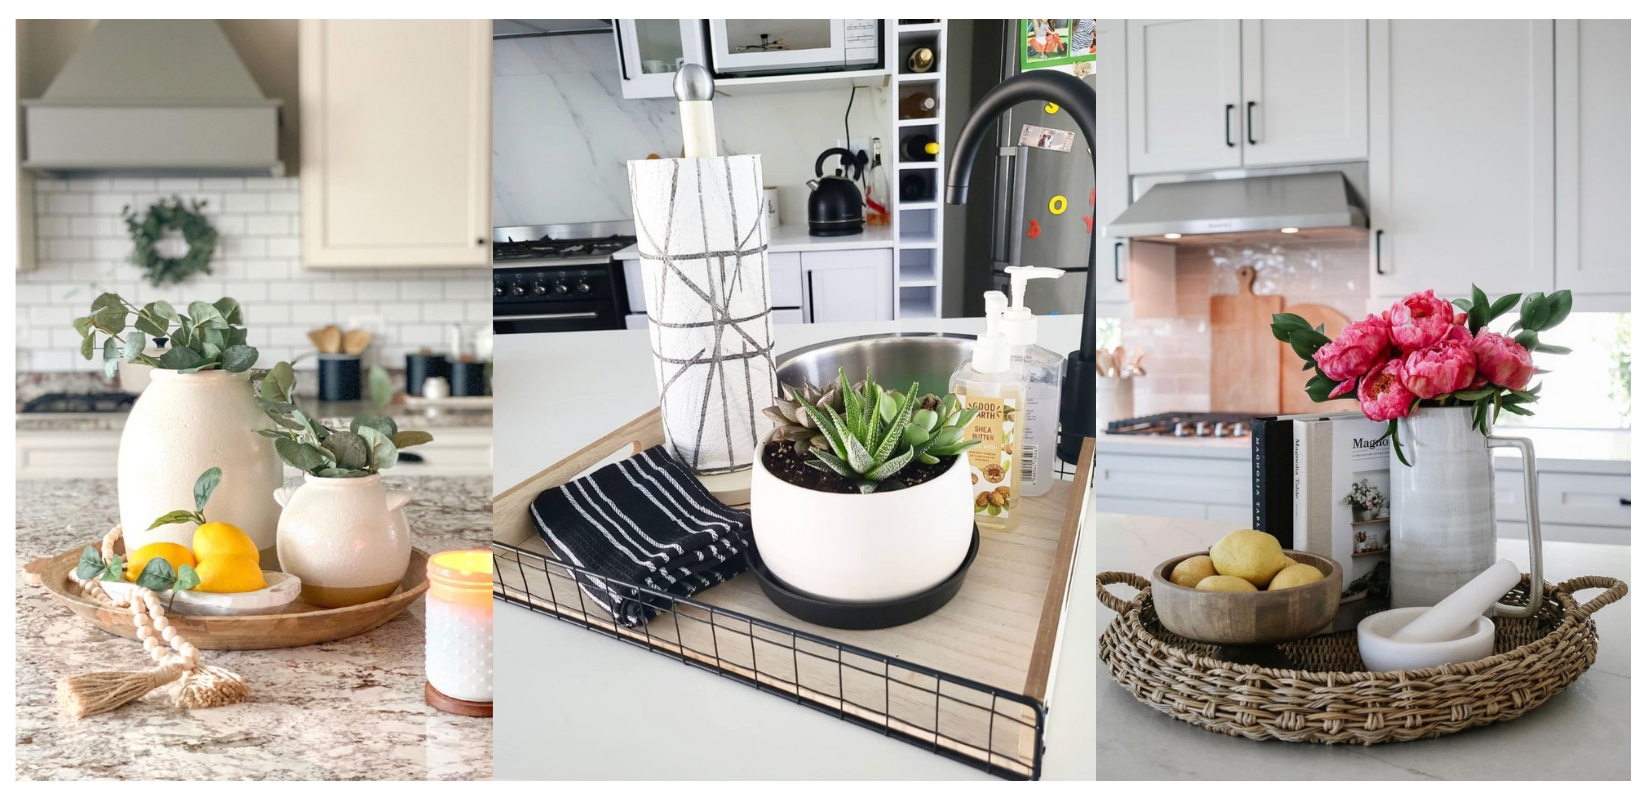 Layered trays and bowls create dimensional interest with careful arrangement of decorative elements. Source: The Chic Quota
Material Selection
Mix materials like hammered copper bowls, marble trays, and wooden vessels to create rich textural interest. Choose 2-3 primary materials that complement your kitchen’s existing finishes such as brass accents with white ceramic or matte black with natural wood. Include glass pieces to reflect light and add sparkle to your display. For coastal kitchens, incorporate woven seagrass trays paired with mother-of-pearl bowls. Select high-contrast combinations like sleek metallic bowls on rough-hewn wooden trays. Add warmth with handcrafted pottery bowls featuring organic shapes and glazes that highlight your color scheme.
 Mixing materials like wood, ceramics, and metal creates a richly textured display on this kitchen island tray arrangement. Source: Malena Permentier
Statement Kitchen Utensil Displays
Transform your everyday kitchen tools into stunning decorative elements that showcase both style and functionality on your island countertop.
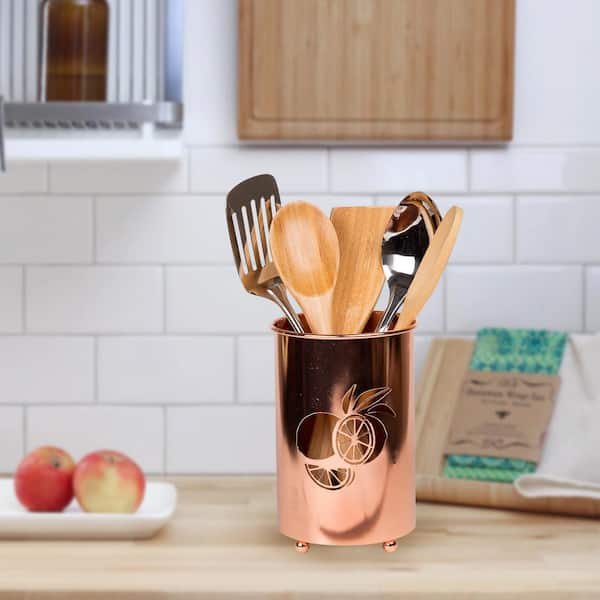
Copper and Metallic Arrangements
Create a gleaming focal point by displaying your copper and metallic utensils in vintage-inspired crocks or modern holders. Mix warm copper pieces with brushed nickel or brass utensils to add depth and visual interest. Position larger items like copper pots or Moscow mule mugs at the back while arranging smaller tools like measuring spoons and whisks in graduating heights toward the front. Add character with unique pieces like copper colanders or antique-style mixing bowls as anchoring elements. For maximum impact group items in odd numbers using the rule of three or five while maintaining clear sight lines across your island.
 A collection of copper and metallic utensils creates a sophisticated statement centerpiece with functional value. Source: Amazon.com
Functional Art Creation
Turn your most-used utensils into an artistic display by organizing them based on both form and function. Start with a sleek utensil holder or repurposed wine bottle as your centerpiece then arrange wooden spoons, bamboo tools, and stainless steel implements at varying heights. Create zones for different cooking tasks like baking tools on one side and cooking utensils on the other. Add personality with colorful silicone spatulas or uniquely handled serving pieces that complement your kitchen’s color scheme. Keep frequently used items within easy reach while positioning decorative pieces like carved wooden spoons or artisanal pasta tools as eye-catching accents.
 A decorative copper utensil holder transforms functional kitchen tools into an artistic display. Source: The Home Depot
Potted Succulent Gardens
Transform your kitchen island into a striking desert oasis with carefully curated succulent arrangements that add natural beauty and require minimal care.
Desert-Inspired Designs
Create a stunning centerpiece by arranging succulents of different heights, sizes, and colors in a large shallow concrete or copper planter. Start with a tall statement piece like Euphorbia trigona or Jade Plant as your focal point. Surround it with medium-sized echeverias in rose patterns and trailing string of pearls cascading over the edges. Add visual interest by incorporating natural elements like white sand, small pebbles, or polished river rocks between plants. For maximum impact, mix textures by combining spiky aloe vera with rounded paddle plants and ruffled echeverias in a harmonious desert palette of sage, blue-green, and dusty rose.
:strip_icc()/tabletop-succulent-garden-101130092-962f6341aad2465aadb076535e739399.jpg) A thoughtfully designed succulent arrangement combines various textures and forms in a cohesive display. Source: Better Homes & Gardens
A thoughtfully designed succulent arrangement combines various textures and forms in a cohesive display. Source: Better Homes & Gardens
Low-Maintenance Options
Choose hardy varieties like zebra haworthia, snake plants, and burro’s tail for a worry-free display that thrives in indoor conditions. Group these resilient plants in sleek geometric containers using well-draining cactus soil to prevent overwatering issues. Space your succulents about 2-3 inches apart to allow for growth while maintaining a clean modern look. Add a layer of decorative gravel or colored sand on top to lock in moisture and create a polished finish. These tough plants only need watering every 2-3 weeks making them perfect for busy homeowners who want style without the fuss.
 Low-maintenance succulents in modern geometric containers offer style with minimal care requirements. Source: Amazon.com
Seasonal Decorative Box Arrangements
Transform your kitchen island with versatile decorative boxes that adapt to every season while adding style and functionality to your space.
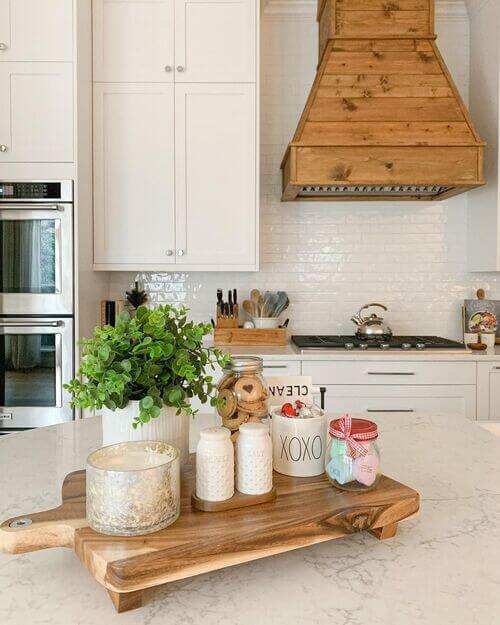
Holiday Theme Ideas
Create a stunning Halloween display with black matte boxes filled with faux cobwebs, mini pumpkins, and battery-operated purple lights. For Christmas, switch to metallic gold boxes layered with pine branches, mercury glass ornaments, and cinnamon sticks. Welcome spring with pastel-colored boxes featuring faux cherry blossoms, moss accents, and decorated eggs. Summer calls for coastal-themed boxes filled with seashells, driftwood, and blue sea glass. Keep your display fresh by swapping decorative elements monthly using items like fall leaves, acorns, pinecones, or Valentine’s hearts. Mix box sizes to create visual interest using the rule of three with small, medium, and large containers.
 A seasonal decorative box arrangement featuring holiday-themed elements creates a festive kitchen island centerpiece. Source: Grace In My Space
Storage Solutions
Make your decorative boxes work double duty by choosing ones with hidden storage compartments. Use stackable boxes to maximize vertical space while maintaining an elegant display. Pick boxes with removable dividers to organize seasonal items like napkin rings, coasters, or small serving pieces. Store frequently used items in lower boxes for easy access while placing purely decorative pieces in upper boxes. Consider magnetic-closure boxes that open easily but stay securely shut. Choose weatherproof materials like lacquered wood or treated bamboo to protect items from kitchen moisture. Add small drawer organizers inside larger boxes to keep tiny decorative elements sorted and ready for the next seasonal swap.
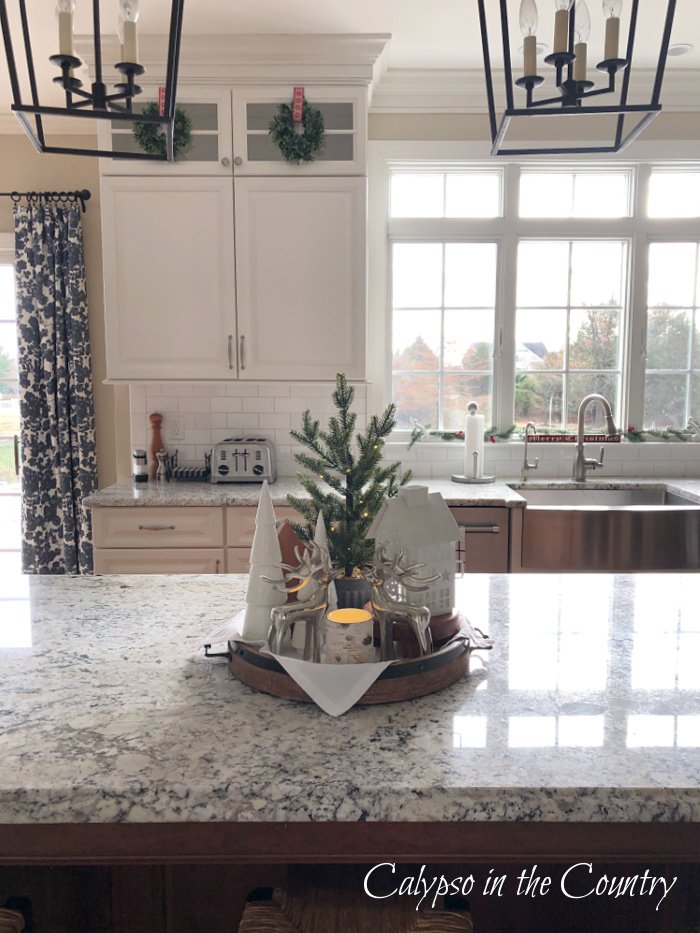 Decorative boxes with storage capabilities combine form and function for practical kitchen island centerpieces. Source: Calypso in the Country
Artisan Pottery Collections
Transform your kitchen island into an art gallery with carefully curated handmade pottery pieces that showcase local craftsmanship and add organic charm to your space.
Handcrafted Elements
Start your pottery display with a large handthrown centerpiece bowl as your anchor piece. Position 3-5 smaller vessels like bud vases, vases, or pinch pots around it at varying heights. Mix different pottery techniques like raku, slab-built pieces, or wheel-thrown items to create visual interest. Add texture with pieces featuring unique glazing patterns, carved details, or impressed designs. Consider including functional pieces like olive oil cruets, butter dishes, or salt cellars that blend beauty with practicality. Display items in odd-numbered groupings using wooden risers or stands to create depth.
 A collection of handcrafted pottery pieces in varying shapes and sizes creates an artisan centerpiece display. Source: Pinterest
Color Harmony
Select pottery pieces in 2-3 complementary colors that match your kitchen’s palette. Earth tones like terracotta, sage, and cream work well for traditional spaces while bold cobalt, indigo, or matte black suit modern kitchens. Layer pieces from light to dark, creating an ombré effect with your collection. Mix glazed and unglazed surfaces to add depth while maintaining your color story. Include one statement piece in a contrasting hue to create a focal point. Group similar colors together in clusters while varying heights and shapes for visual flow.